
Building A Serverless URL Shortener With AWS Lambda & DynamoDB
A look at building a simple yet effective URL shortener with AWS serverless services


Oftentimes, websites will shorten external links so that they are more manageable and easy to copy and share with others.
The implementation behind this is quite simple yet may seem complex.
In this article, I will demystify the process and make it as easy and quick as possible so you can follow along and implement it yourself.
Let’s get started!
Tech Stack
Here’s the serverless stack we’ll be using:
AWS Lambda
Amazon DynamoDB
JavaScript (for our Front-end App)
The Plan
This is how our URL shortening feature will work:
Users will submit classical long-form URLs in the app via Lambda Function URLs.
Lambda will then generate a short code from the long input URL and then store the original and the short URL in a DynamoDB table.
When a user visits the short URL, another Lambda function will retrieve the long URL from our database table and redirect the user to it.
Short and simple. Let’s get started!
Implementation
DynamoDB
Let’s start by creating a new DynamoDB table in AWS.
Log in to AWS and navigate to the DynamoDB console. On this page create a new table.
The configuration is easy: name the table URLShortener and the partition key shortCode (a sort key isn’t needed).

Create the table as it is, with the rest of the defaults.
With the table created let’s go ahead and write the Lambda code that will handle the URL shortening.
Lambda
In the Lambda console, create a new function.
Choose the Author From Scratch option.
Name the function CreateShortURL. Choose the Node 20 version runtime.
For the function permissions, you need to add permissions to DynamoDB so that Lambda can write and read from our DynamoDB table.

If you are not familiar with permissions in AWS read this article to learn how to add the necessary permissions.
Create the function.
On the function page, navigate to the code section below:
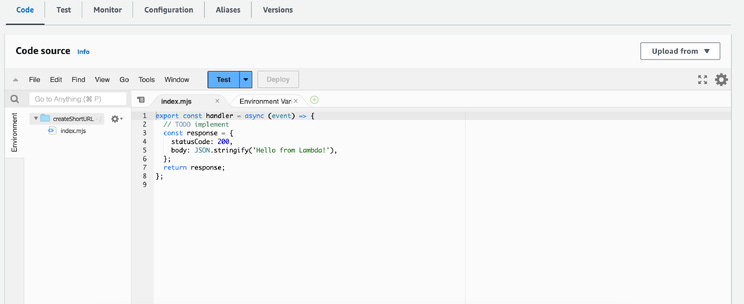
First, we’ll rename the file — on the left sidebar — index.mjs to index.js.
Now let’s replace the placeholder code with the necessary code below to shorten URLs.
createShortURL function:
const { DynamoDBClient, PutItemCommand } = require("@aws-sdk/client-dynamodb");
const crypto = require('crypto');
const dynamo = new DynamoDBClient();exports.handler = async (event) => {
    const body = JSON.parse(event.body);
    const originalURL = body.url;

    if (!originalURL) {
        return {
            statusCode: 400,
            body: JSON.stringify({ error: 'URL is required' })
        };
    }    const shortCode = crypto.randomBytes(4).toString('hex');
    const expirationDate = new Date();
    expirationDate.setFullYear(expirationDate.getFullYear() + 1);    const params = {
        TableName: "URLShortener",
        Item: {
            shortCode: { S: shortCode },
            originalURL: { S: originalURL },
            expirationDate: { S: expirationDate.toISOString() }
        }
    };    try {
        const command = new PutItemCommand(params);
        await dynamo.send(command);
        return {
            statusCode: 200,
            body: JSON.stringify({ shortCode })
        };
    } catch (error) {
        return {
            statusCode: 500,
            body: JSON.stringify({ error: error.message })
        };
    }
};
The code above will accept a regular long-form URL from — typically — a fetch request on the front-end. It will use the crypto library to generate a 4-byte hexadecimal string. It then performs the operations to write the generated shortCode to DynamoDB, along with an expiration date and the original URL.
Save and Deploy this function.
Let’s get a function URL to be able to call this function code.
Above the function code, click on the Configuration tab, and then in the left sidebar menu, click on the Function URL link.

Now click on the button Create function URL.
In the Auth type choose “none”.
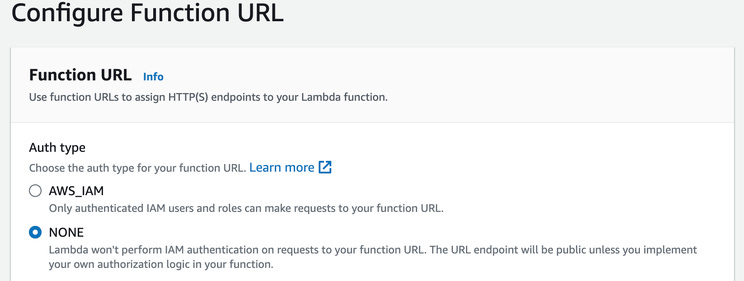
Below check the Configure CORS checkbox:

Click on the save button below and you’ll be redirected back to the function page.
You will now see a function URL.

Copy this function URL, we’ll be using that in the fetch request on our frontend soon.
We’ll now create the redirectURL Lambda function which will accept a shortCode string as input and find the matching long-form URL on the database and redirect the user to that URL.
Back in the Lambda console, create a new function.
Call it redirectURL and use the same settings we did for the first function.

Similarly, in the code section below, add the following code:
(don’t forget to rename the function index file to index.js — instead of index.mjs).
redirectURL function:
const { DynamoDBClient, GetItemCommand } = require("@aws-sdk/client-dynamodb");
const dynamo = new DynamoDBClient();exports.handler = async (event) => {
    const shortCode = event.queryStringParameters.shortCode;

    const params = {
        TableName: "URLShortener",
        Key: {
            shortCode: { S: shortCode }
        }
    };    try {
        const command = new GetItemCommand(params);
        const result = await dynamo.send(command);

        if (!result.Item) {
            return {
                statusCode: 404,
                body: JSON.stringify({ error: 'Short URL not found' })
            };
        }        return {
            statusCode: 200,
            body: JSON.stringify({result:result.Item.originalURL.S})
        };
    } catch (error) {
        return {
            statusCode: 500,
            body: JSON.stringify({ error: error.message })
        };
    }
};
The code above will accept a short code string from the path parameters when calling the function. It will query our DynamoDB table for the shortCode as the partition key and get the item that matches. Inside the item will be the matching original URL. We’ll then display the original URL to the user in the front end.
Follow the process we went through above to create a function URL for this function as well.
Once you have both function URLs, we’re ready to code our front end — the last step of our app!
Frontend App
For the front-end app, I’ll be using a simple HTML/JS app.
Here’s the HTML code:
<html>
  <body>
    <h1>URL Shortener</h1>
    <form id="urlForm">
        <input type="url" id="originalURL" placeholder="Enter your URL here">
        <button type="submit">Shorten</button>
    </form>    <p id="result"></p>
    <br/>

    <form id="urlForm-2">
        <input type="text" id="shortCode" placeholder="Enter your shortCode here">
        <button type="submit">Visit</button>
    </form>    <p id="result-2"></p>  </body>
</html>
The form has two simple input fields; one to shorten a URL and the other to return the original URL from a short-form URL input.
Here’s the JS code that will make a fetch call to POST a long-form URL to our Lambda function:
<script>
    document.getElementById('urlForm').addEventListener('submit', async function(event) {
        event.preventDefault();
        const originalURL = document.getElementById('originalURL').value;
        const response = await fetch('https://y4spbpcwqb4ox4uvpngqebrnvu0kvmzg.lambda-url.us-east-1.on.aws/', {
            method: 'POST',
            body: JSON.stringify({ url: originalURL })
        });
        const data = await response.json();
        document.getElementById('result').innerText = `Shortened URL: https://urlapp.com/${data.shortCode}`;
    });
</script>
(*don’t forget to change the fetch call URL to your own URL).
Then the JS code that will make a GET call to our second Lambda function that takes in a short-form URL as input and returns the matching long-form URL.
<script>
  document.getElementById('urlForm-2').addEventListener('submit', async function(event) {
      event.preventDefault();
      const shortCode = document.getElementById('shortCode').value;
      const shortCodeString = shortCode.substring(shortCode.lastIndexOf('/') + 1);
      const response = await fetch(`https://t55i4clj2p3deuszr223qwpmyu0dgxhn.lambda-url.us-east-1.on.aws?shortCode=${shortCodeString}`);
      const data = await response.json();
      document.getElementById('result-2').innerText = `Original URL: ${data.result}`;
  });
</script>
(*again don’t forget to change the fetch call URL to your own URL).
Putting it all together, you can run your frontend code and should see something similar to the following:

I have inputted a regular long URL in the first input. I then receive the response as a short-form URL.
I can copy this short-form URL and input it in the second input field.
When I hit “Visit”, I receive the matching long-form URL.
For a more complete experience, you can create an anchor tag and dynamically add the Original URL inside so that when users click on the short-form URL, they will be redirected to the original URL seamlessly.
That’s it, I hope you enjoyed it and learned something!
Conclusion
In this article, we took on a new serverless challenge, to build a fully serverless URL Shortener App.
The implementation was quick and simple:
We created a DynamoDB table to store our shortCodes (and original URLs)
We created two Lambda functions; one to convert a long-form URL to a short-form using a generated shortCode and another function to retrieve the matching original URL with the shortCode from our DynamoDB table.
We wrote 2 basic fetch calls one to POST a URL to our first Lambda function and one to GET the matching original URL.
The serverless approach makes it quick and easy to experiment and test our code in the cloud without spending money or provisioning servers!
👋 My name is Uriel Bitton and I’m committed to helping you master AWS, Cloud Computing, and Serverless development. ☁️
🚀 If you want to learn how to build enterprise-level, scalable, and resilient applications, follow me and subscribe.
🥰 You can also follow my journey on:
See you in the next one!