
Create A Serverless REST API In Minutes With API Gateway
Without having to learn an entire backend language for months.

Building and designing APIs is often a long process and can get complex quickly.
You often need to master a backend language like Java, C# or Node JS/Express JS.
Once you do, you still need a server to host your API on.
That leads to more complexities and costs.
There is a solution however, that is completely serverless and requires virtually no programming experience.
API Gateway
API Gateway is a service offered by AWS that lets you build, manage, and deploy different types of APIs (e.g. REST, HTTP, WebSocket) in a matter of minutes.
What’s more, is that it’s free to use for up to 1 million calls per month and then you are charged a low price of $3.50 for 333 million calls. Virtually insignificant.
Creating A REST API
Let’s start creating a RESTful API with API Gateway.
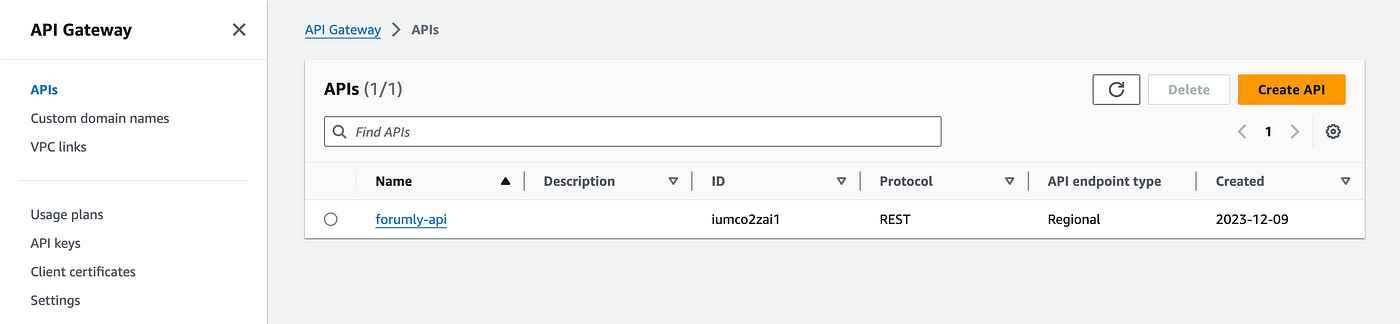
In your AWS console, head over to the API Gateway service.
We’ll start by creating a new API by clicking on the Create API button.
On this new page, choose REST API from the list of options.
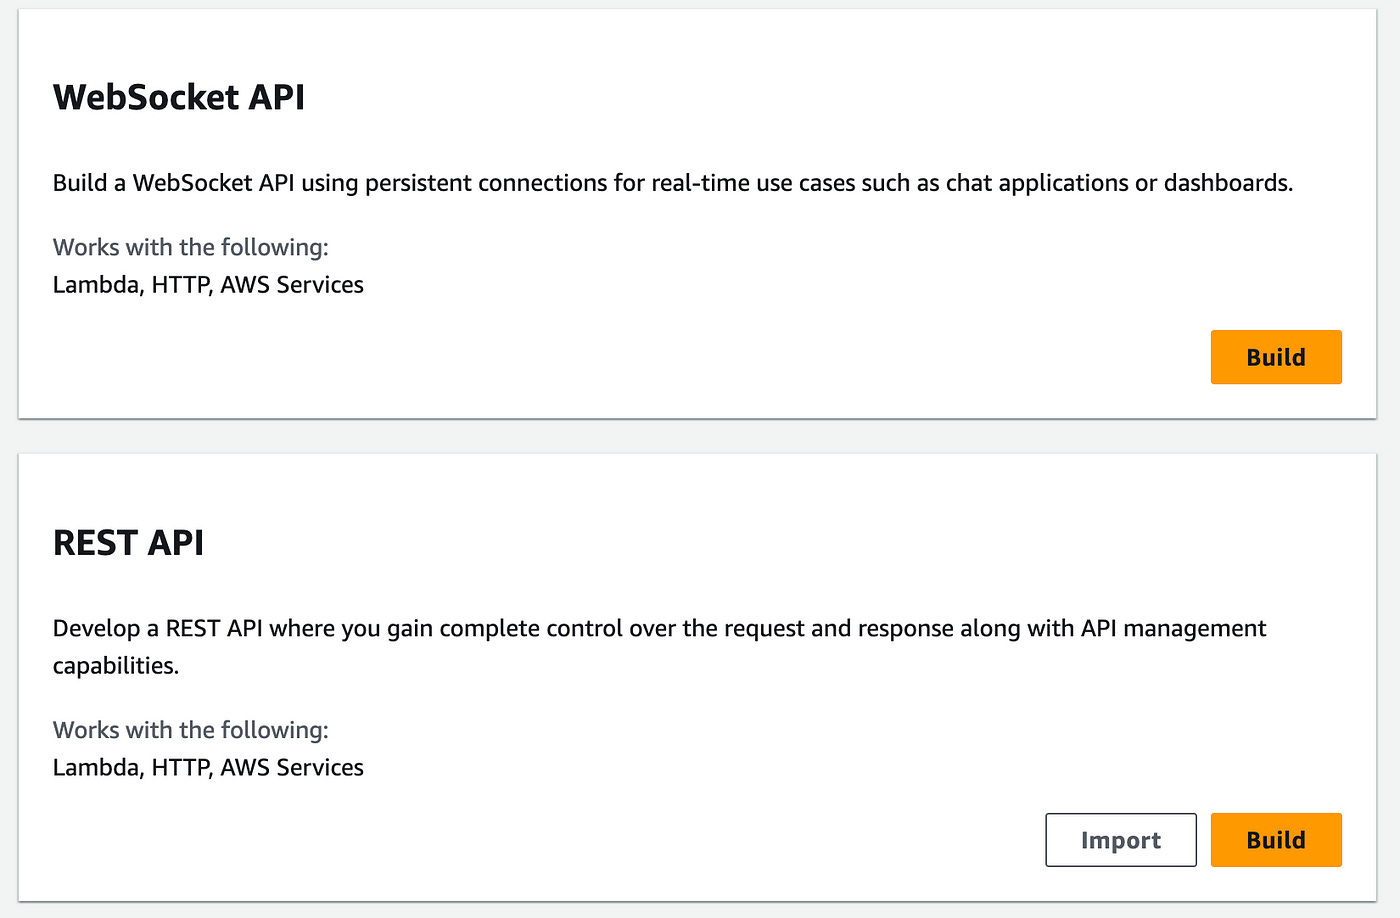
Click on the Build button to start creating your API.
On the next page, you can specify the name, description, and endpoint type.
Choose New API, name it “users-api”, add a description, and choose Regional for the API endpoint type.
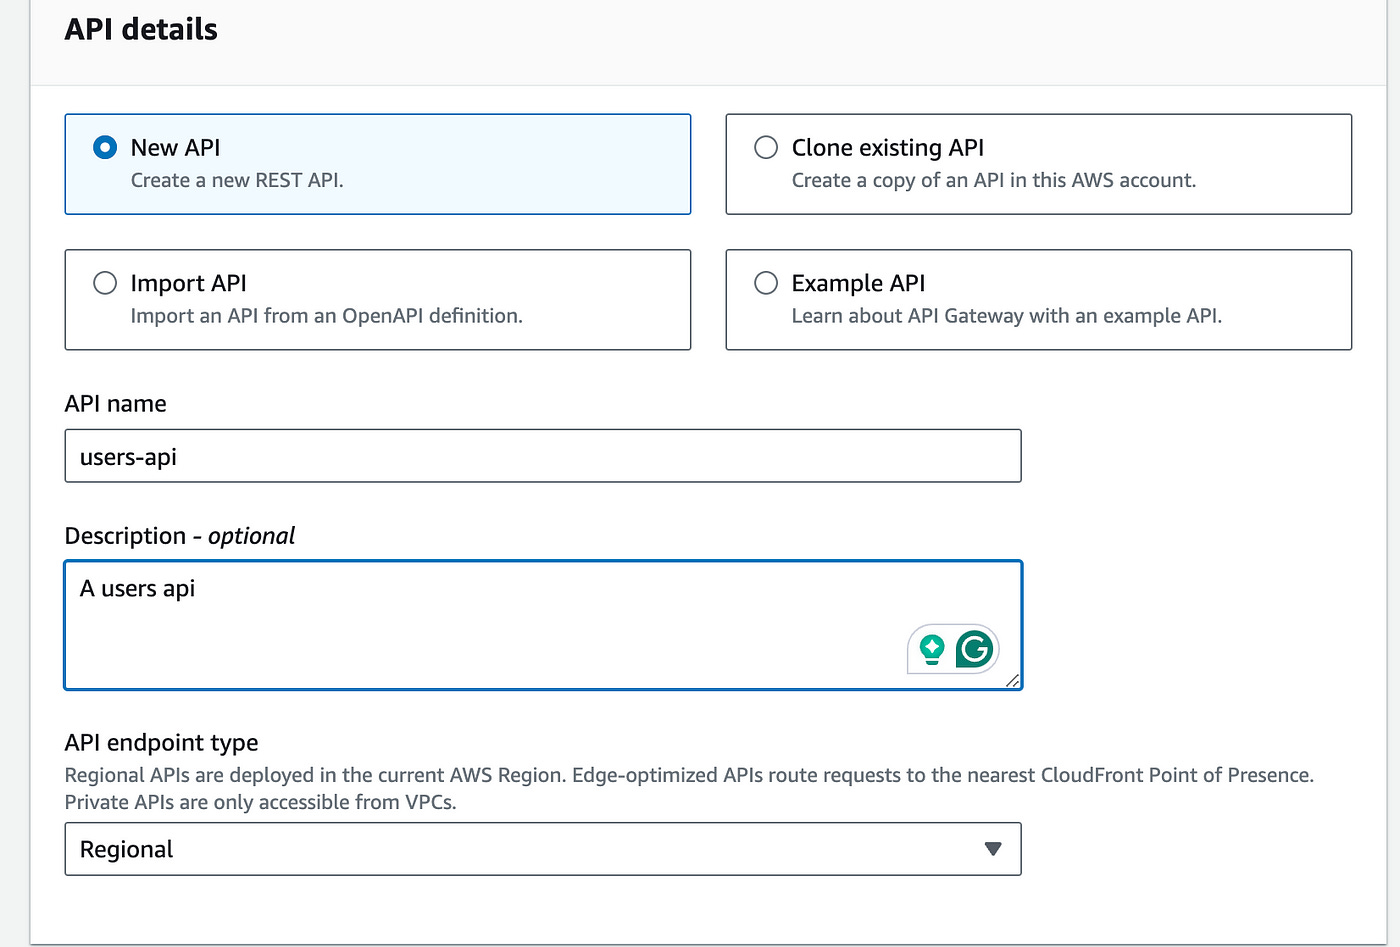
Click on the Create button below to create the API.
Let’s now add a route to get users using a GET method
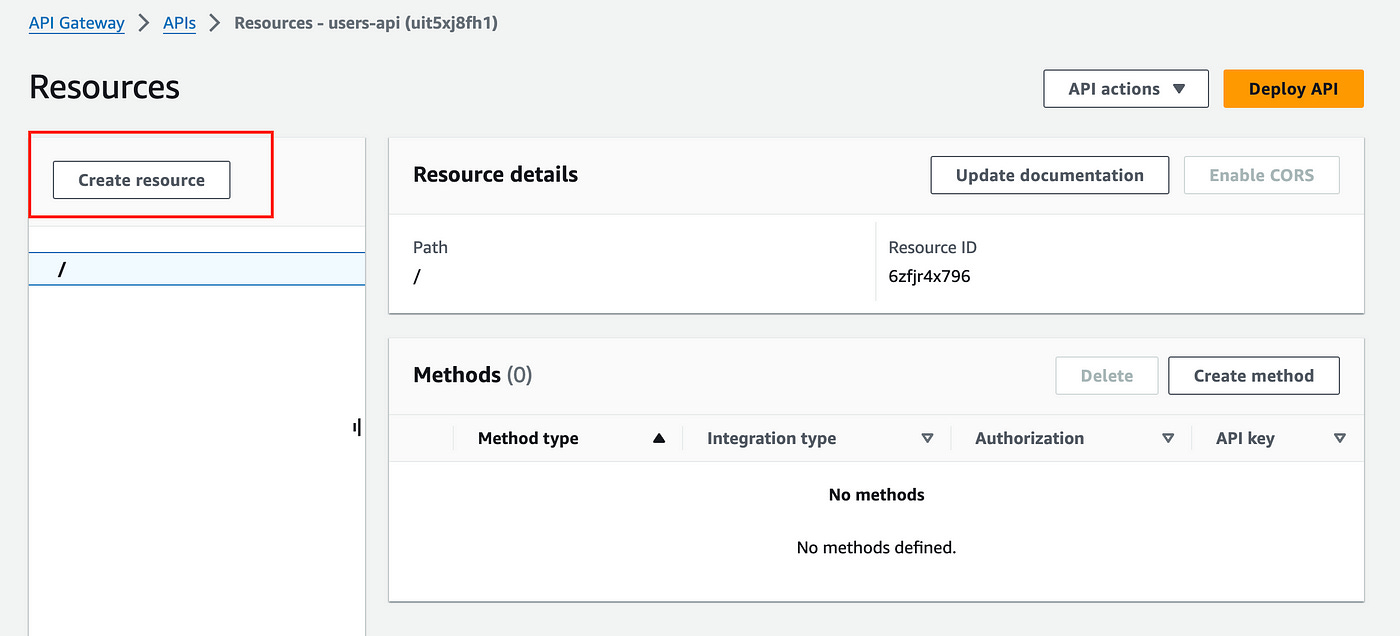
Click on Create resource.
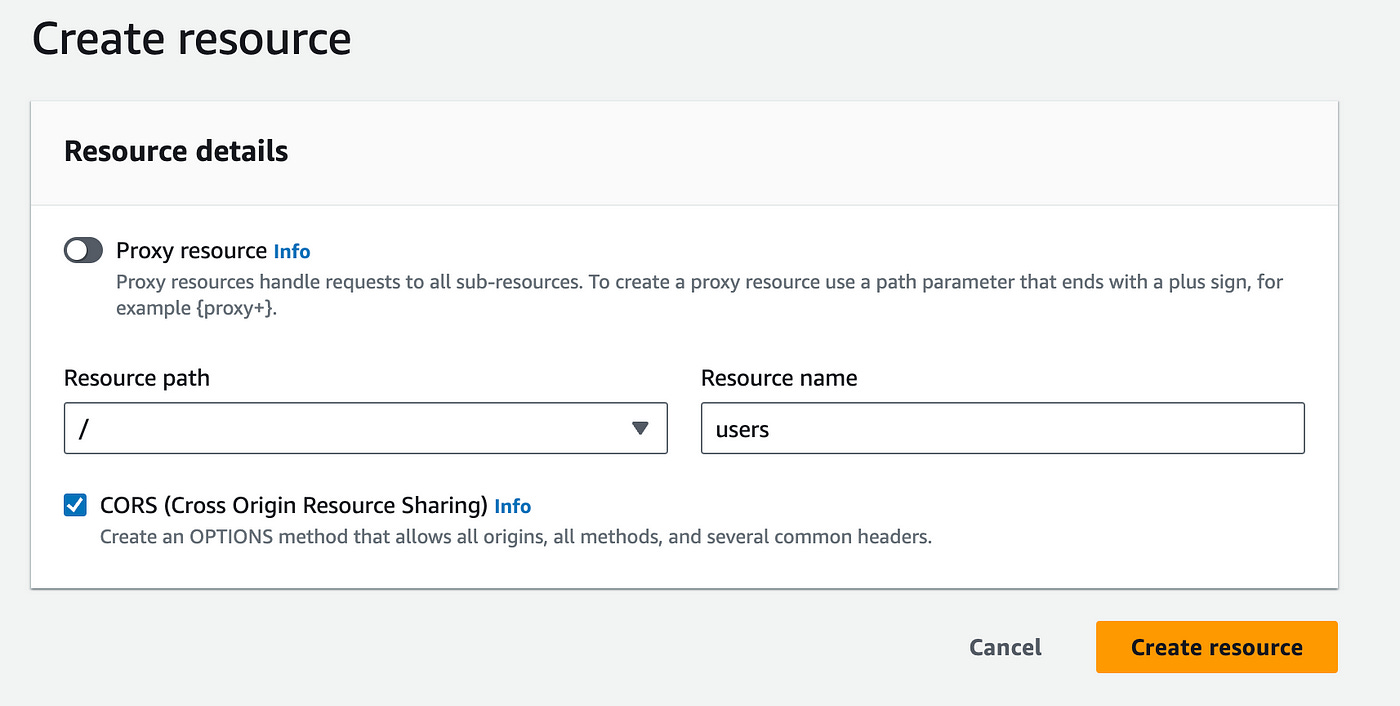
On this page add a resource name under the root (/) path, add “users” for the resource name and check the CORS option.
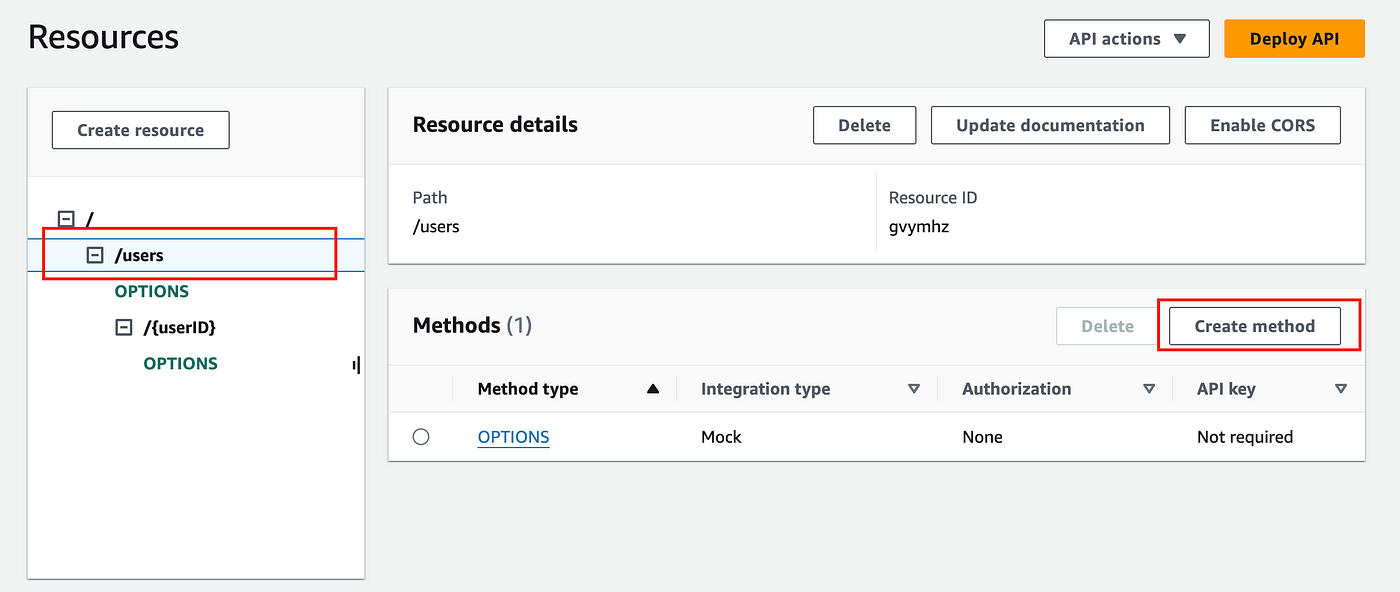
Now we can add methods to our “users” resource.
With the /users resource selected, create a new method for that resource:
Here you can select GET as the Method type and choose the Lambda function integration option.
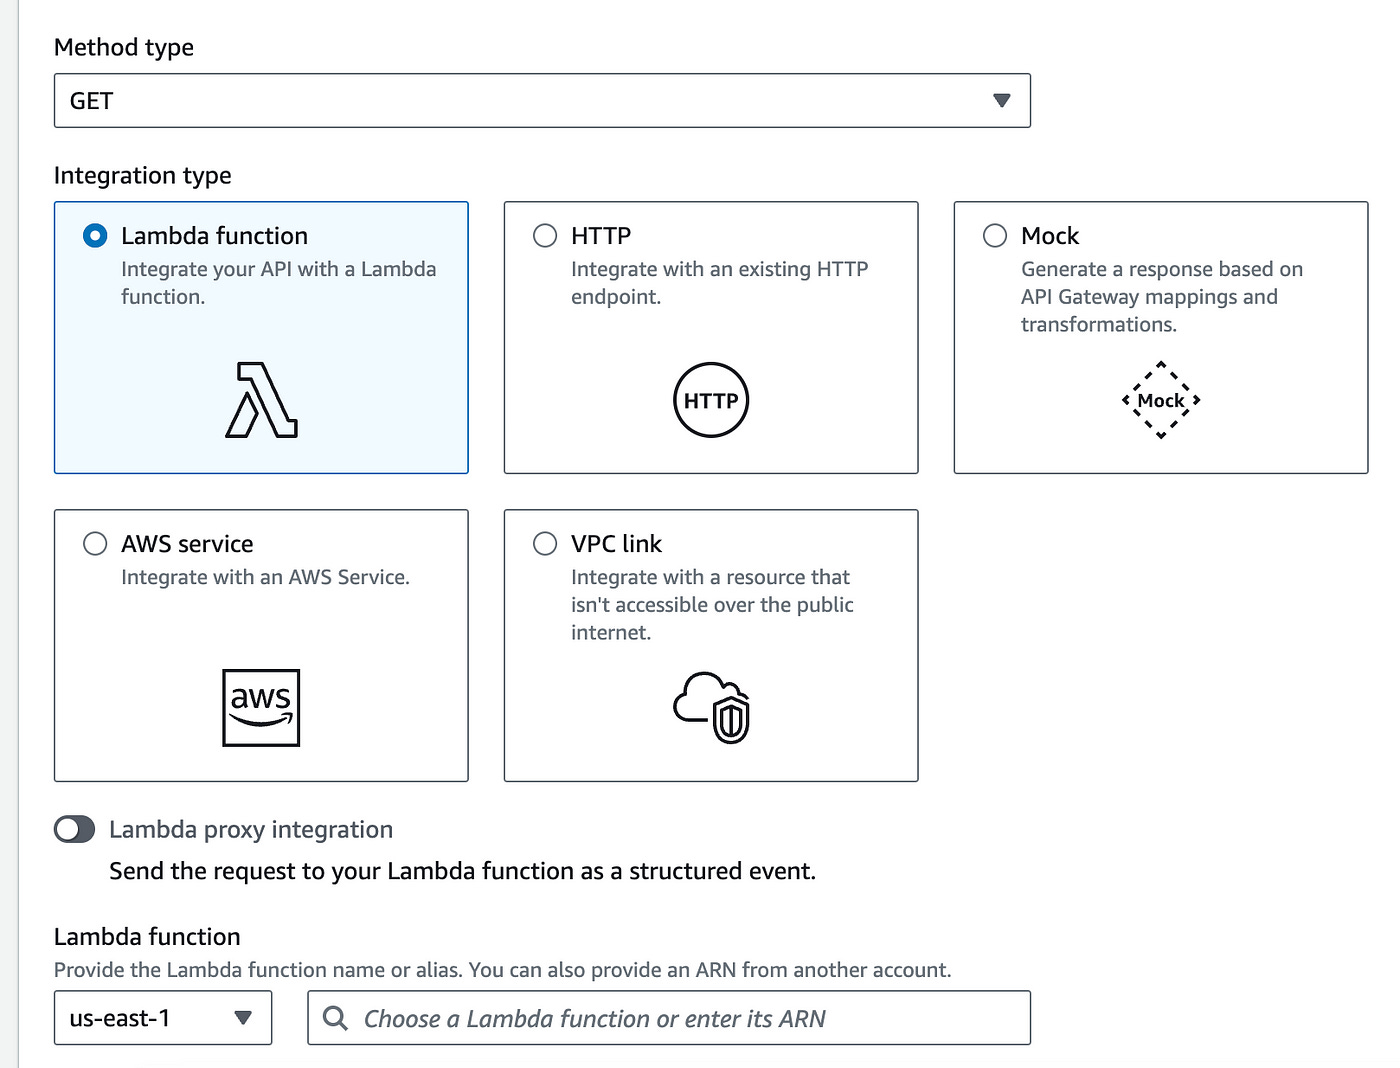
In the Lambda function section, we first need to create a Lambda function to integrate with.
We’ll open a new tab to create our Lambda function and once we create it, we’ll come back here.
Create A Lambda Function
In a new tab, navigate to the Lambda service.
Create a new function.
Give it the following configuration:
Name the function “user-handler”
Choose the Node JS 20.x runtime
Leave the Architecture option as it is
Under permissions: create a new role in IAM with AmazonAPIGatewayInvokeFullAccess permissions to the function (Here’s an easy guide on how to do this).
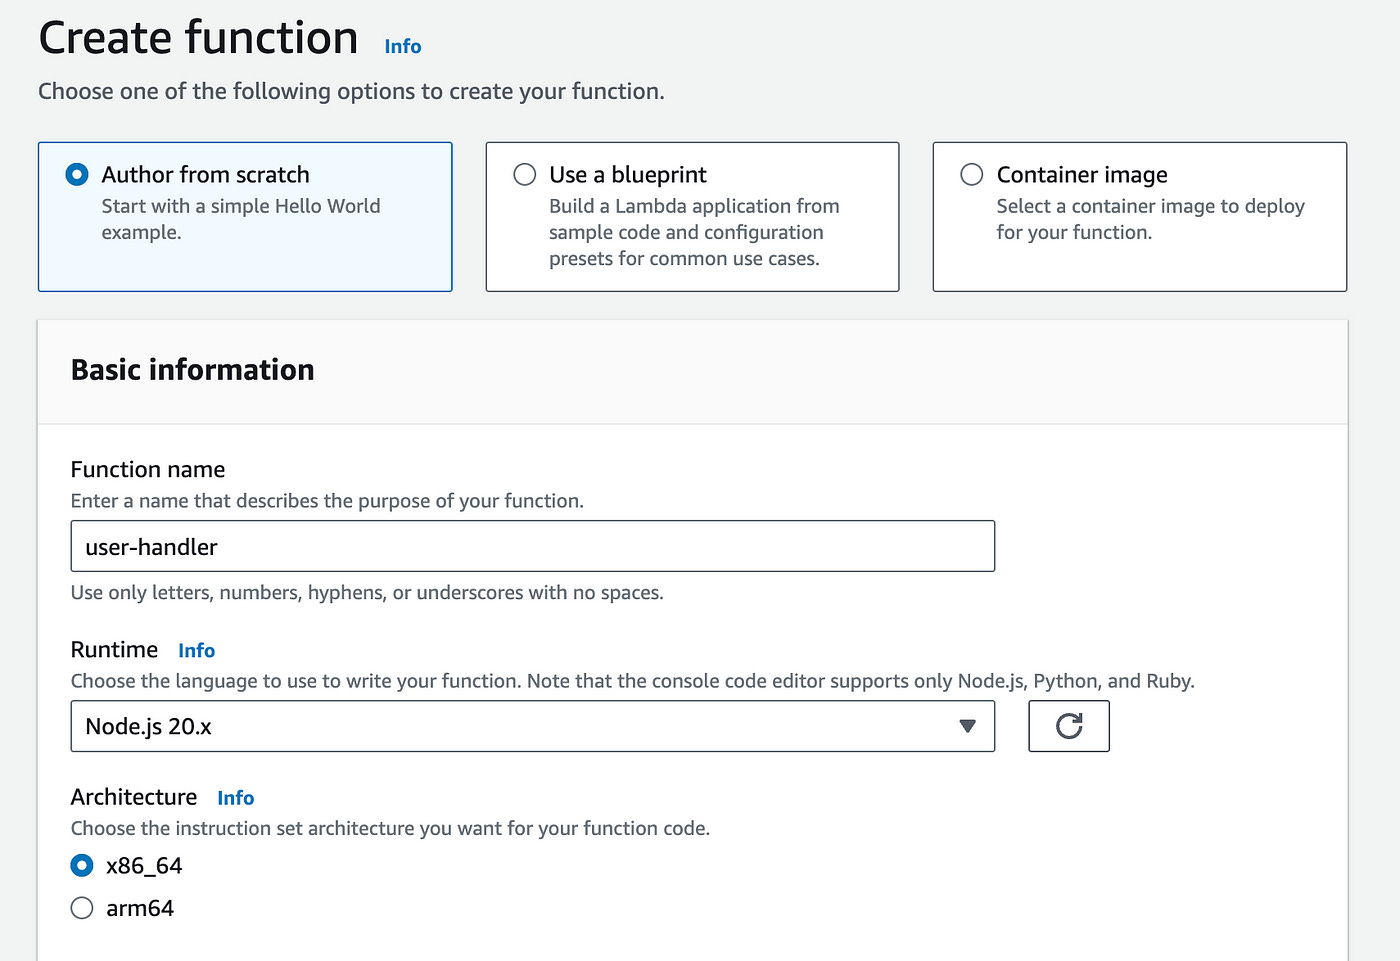
With the new role added, you can now create the function.
In the Code source section below, add the following code:
const users = [
    { "id": "101", "name": "Alice Johnson", "email": "alice.johnson@example.com" },
    { "id": "102", "name": "Bob Smith", "email": "bob.smith@example.com" },
    { "id": "103", "name": "Charlie Brown", "email": "charlie.brown@example.com" }
]
export const handler = async (event) => {
try {
return {
statusCode: 200,
body: JSON.stringify(Object.values(users))
}
}
catch(error) {
return {
statusCode: 500,
body: JSON.stringify({ error })
}
}
};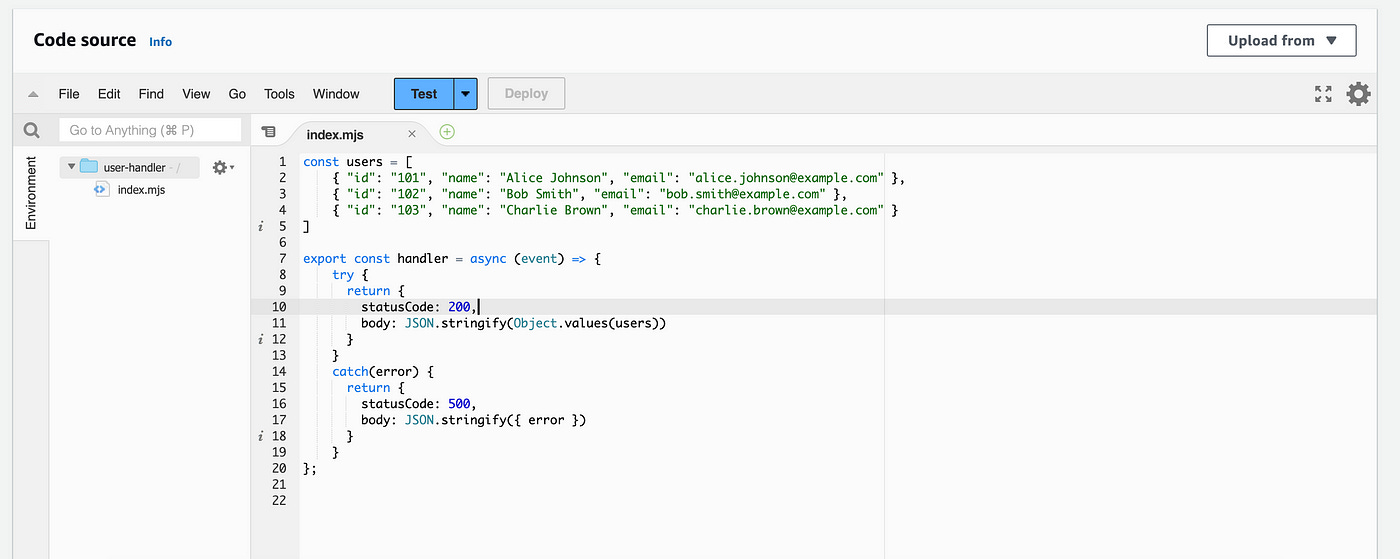
Here we are adding some dummy users and returning that list in the response.
Hit Deploy above to deploy the function code.
Once that’s done, let’s head back to our API Gateway tab.
Integrating Lambda With API Gateway
In the input where we left off, search for the Lambda function we just created: “user-handler”.
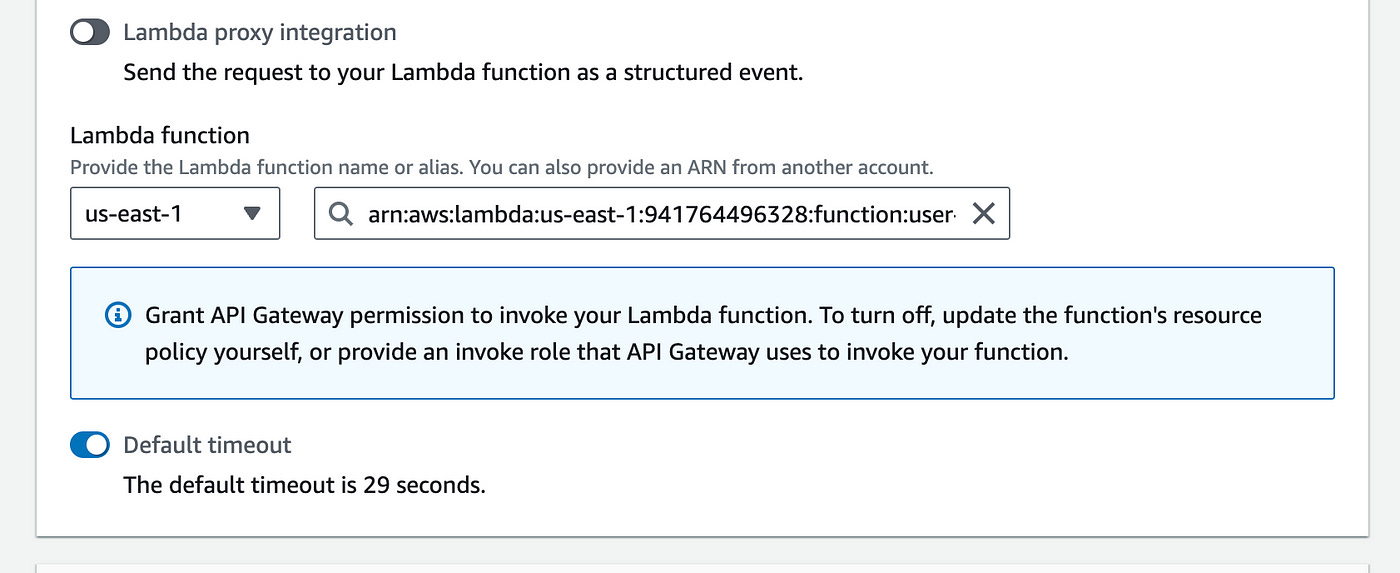
Create the method.
We are now ready to deploy our API.
Click on the Deploy button in the top right corner.
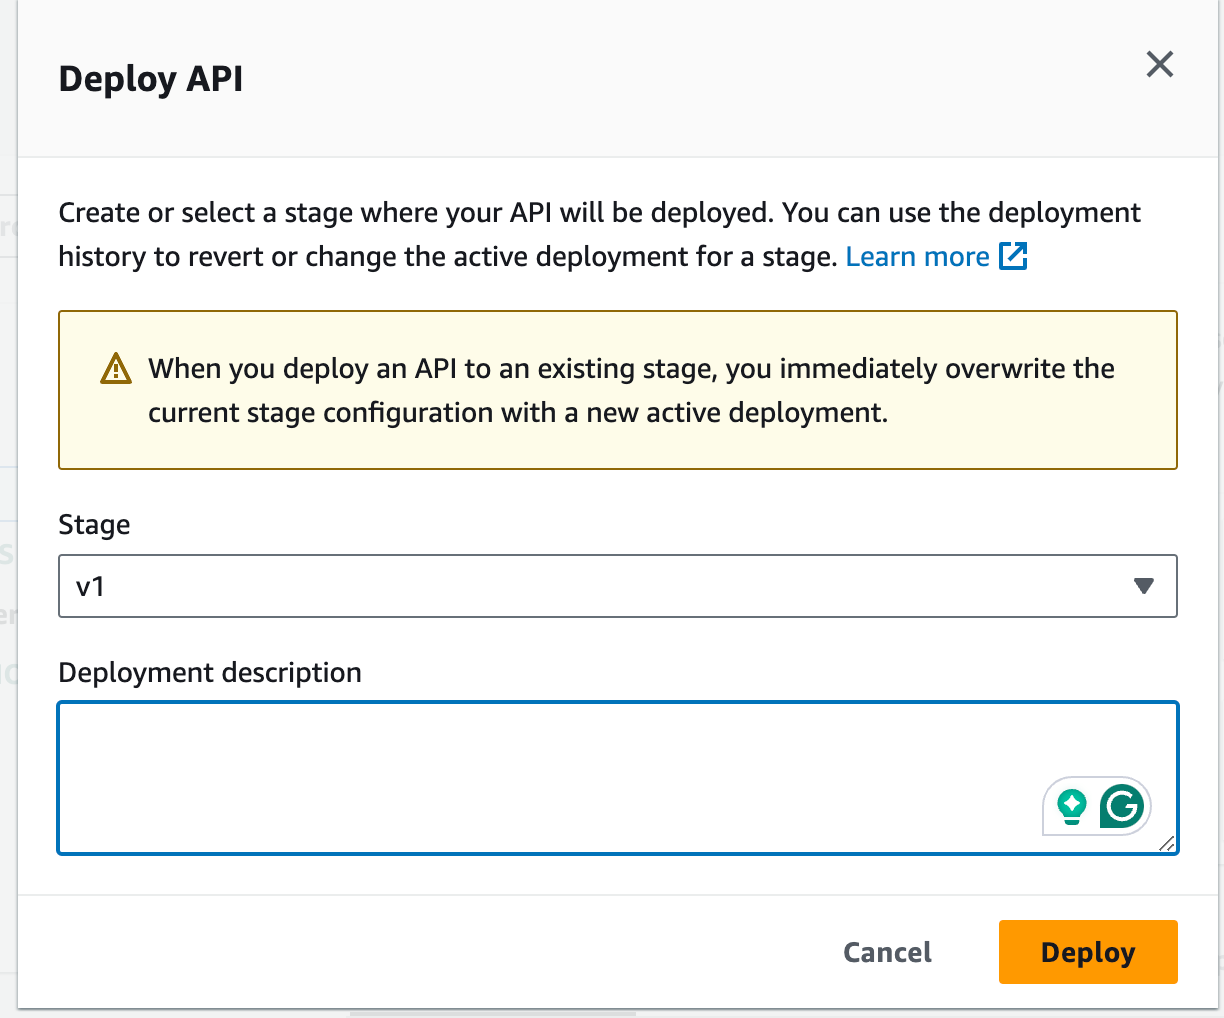
Enter a stage name “v1” and hit Deploy.
The API will be live and you will see an Invoke URL:
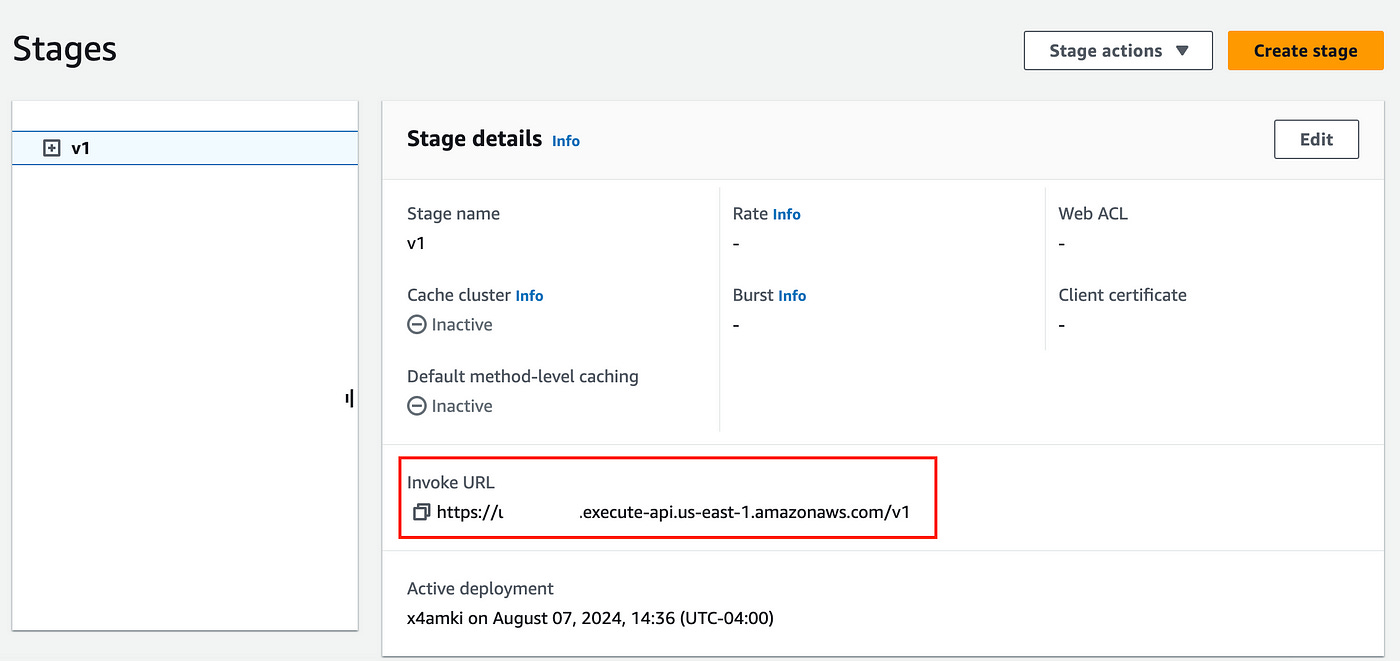
Copy that URL so that we can test it on our browser.
In your browser, open a new tab and copy the URL — don’t forget to add “/users” to the end of the url — which is the path we created to get users.
Here’s what your URL should look like:
https://xyz.execute-api.us-east-1.amazonaws.com/v1/usersWhen you enter this URL, you should see the following output:

Congrats, you have just created a working API.
Now you can continue adding more routes and methods for POST, PUT, DELETE to create a richer API.
Now, how would you add more complex parameters and integrations with your database and external service?
Follow me and stay tuned for more blog posts to come.
Conclusion
API Gateway provides a powerful, cost-effective solution for building and managing APIs without the need for extensive backend knowledge or server maintenance.
By following the steps I outline above, you can quickly create and deploy a fully functional RESTful API, ready to scale with your needs.
👋 My name is Uriel Bitton and I’m committed to helping you master Serverless, Cloud Computing, and AWS.
🚀 If you want to learn how to build serverless, scalable, and resilient applications, you can also follow me on Linkedin for valuable daily posts.
Thanks for reading and see you in the next one!