
Create A Serverless REST API With AWS API Gateway
The quickest and easiest way to create API with AWS in minutes instead of hours.

AWS API Gateway is a managed, serverless service that lets you create, publish, maintain and monitor secure and scalable APIs on the cloud.
That’s a mouthful, in essence it lets you create APIs.
With API Gateway you can create and publish rest APIs in the quickest way possible.
API Gateway offers us several benefits.
The first one is we don’t need to manage any servers or underlying infrastructure. That’s all managed by AWS.
It also scales to our workload, meaning we don’t have to optimize it when our usage grows.
In terms of cost, like many other AWS services, we adapt a pay-per-use model, which is advantageous since when we are not using our API, we aren’t paying anything at all.
The other benefits worth mentioning are API Gateway’s integrations like authentication, authorization, throttling abilities, caching and monitoring.
Hands-On Demo
Now we’ve seen a general overview of API Gateway, let’s dive right into how we can easily create and deploy a rest API in the AWS console.
On the API Gateway page in the console, we can click on Create API button at the top and we will see the following page:
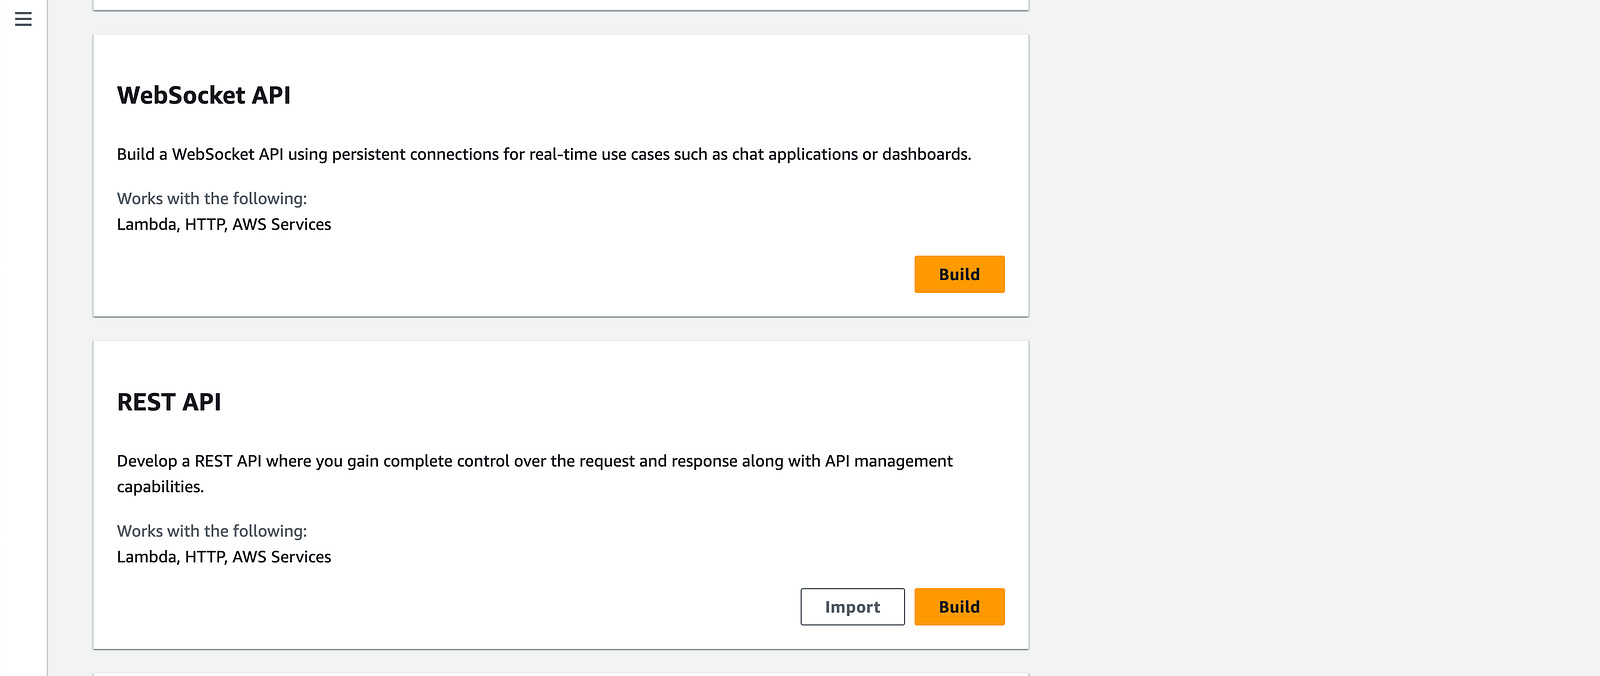
Scroll down to REST API and click on the Build button.
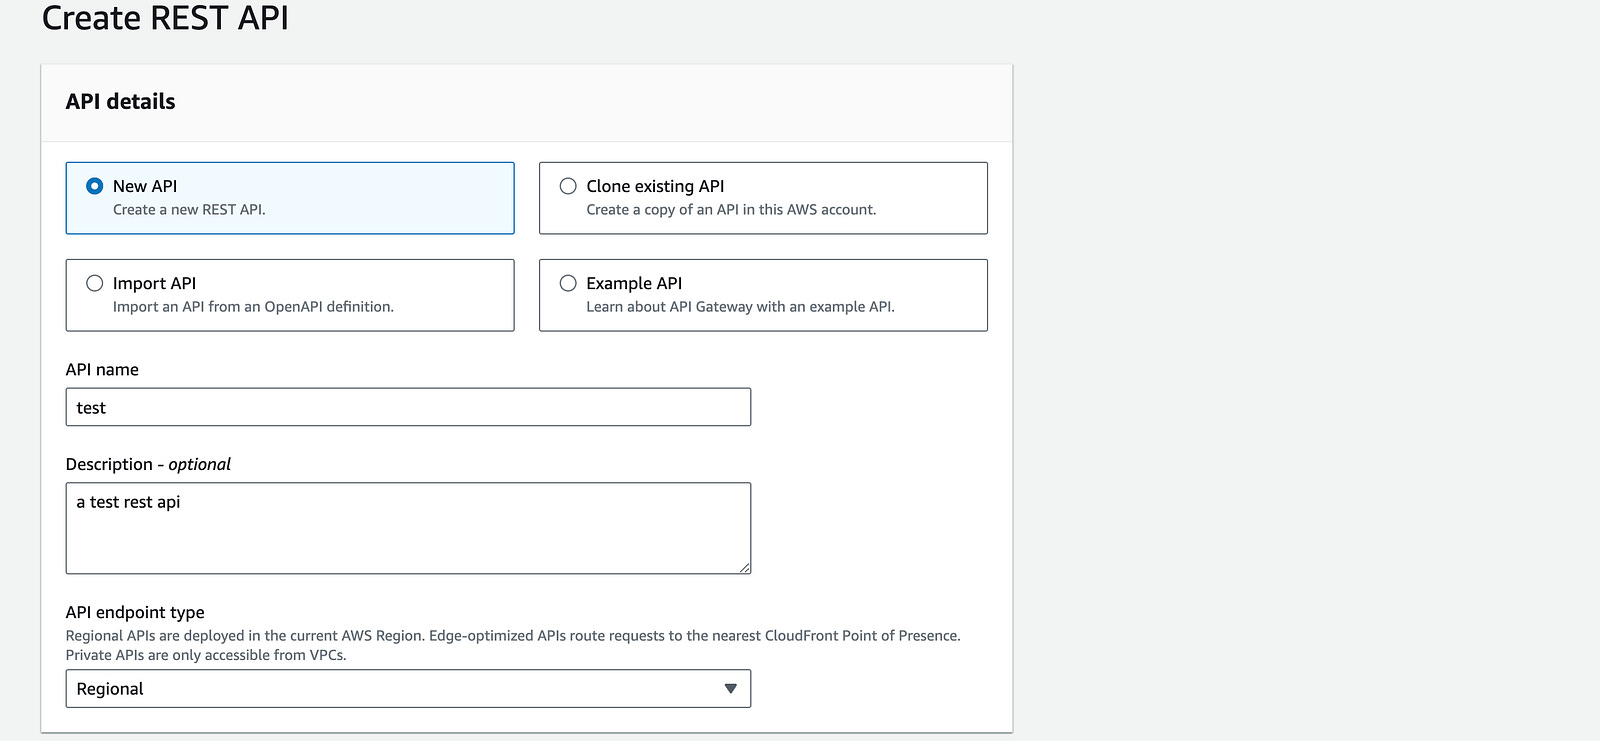
Here we can choose New API then enter a name of our API and optionally a description.
If we wanted to deploy a global API in production we have the option to choose Edge-optimized under endpoint type, which will route requests to our API to the nearest CloudFront (CDN) point of presence for global availability.
For our testing case we will leave the default Regional option selected and go ahead and create the API.
We will then be redirected to the following page — the rest API we just created
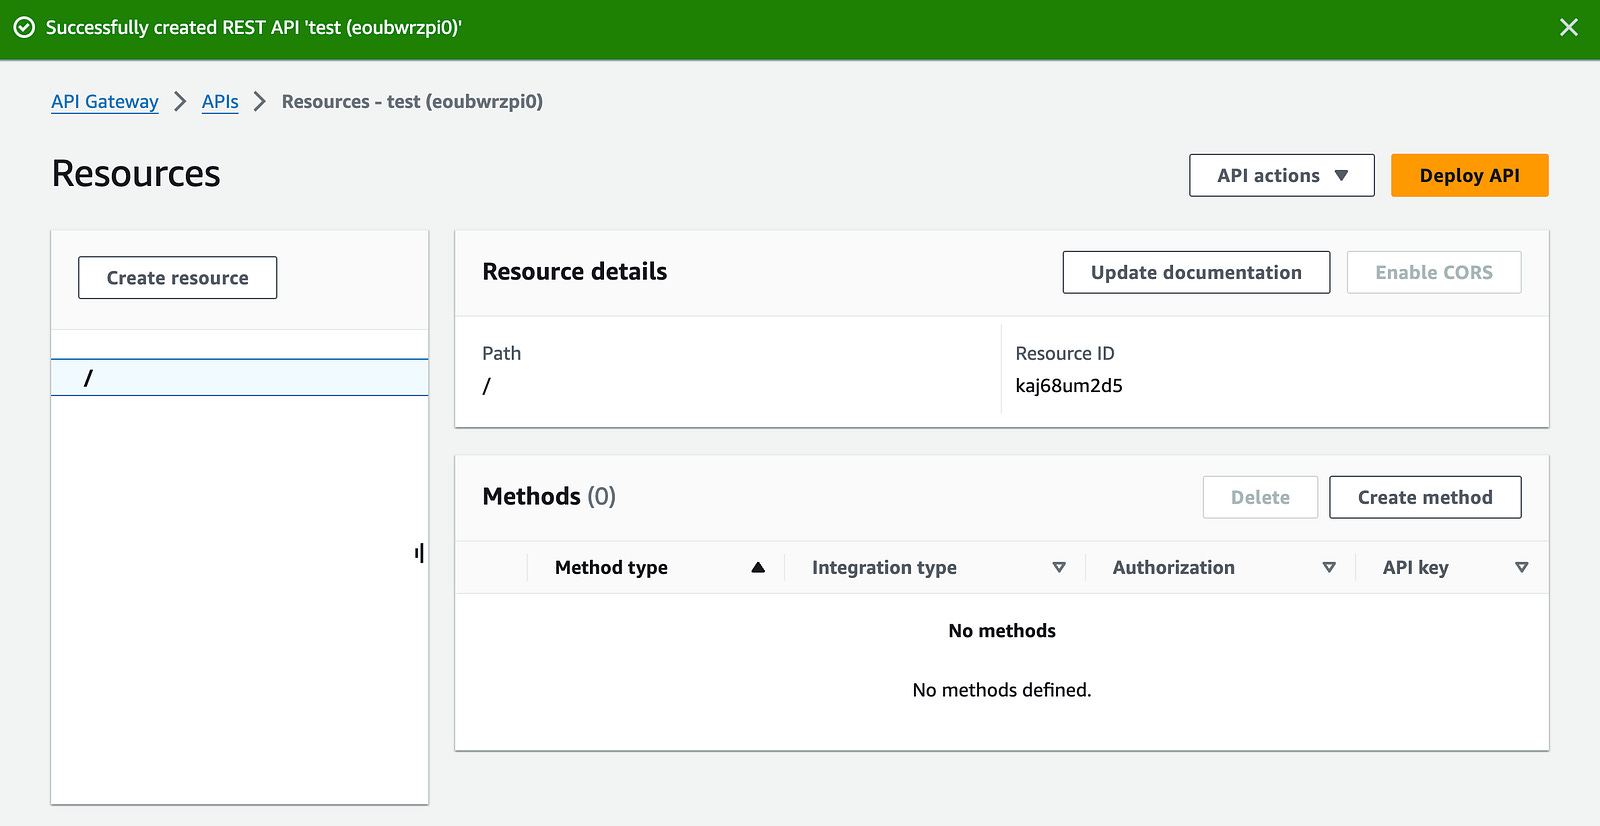
Now we can add resources (paths) as well as create different methods (GET, POST, etc) for each resource.
We’ll start by adding a method under the root path which is denoted by “/”.
Click on the Create Method button in the Methods section.
You’ll be redirected to the create method page:
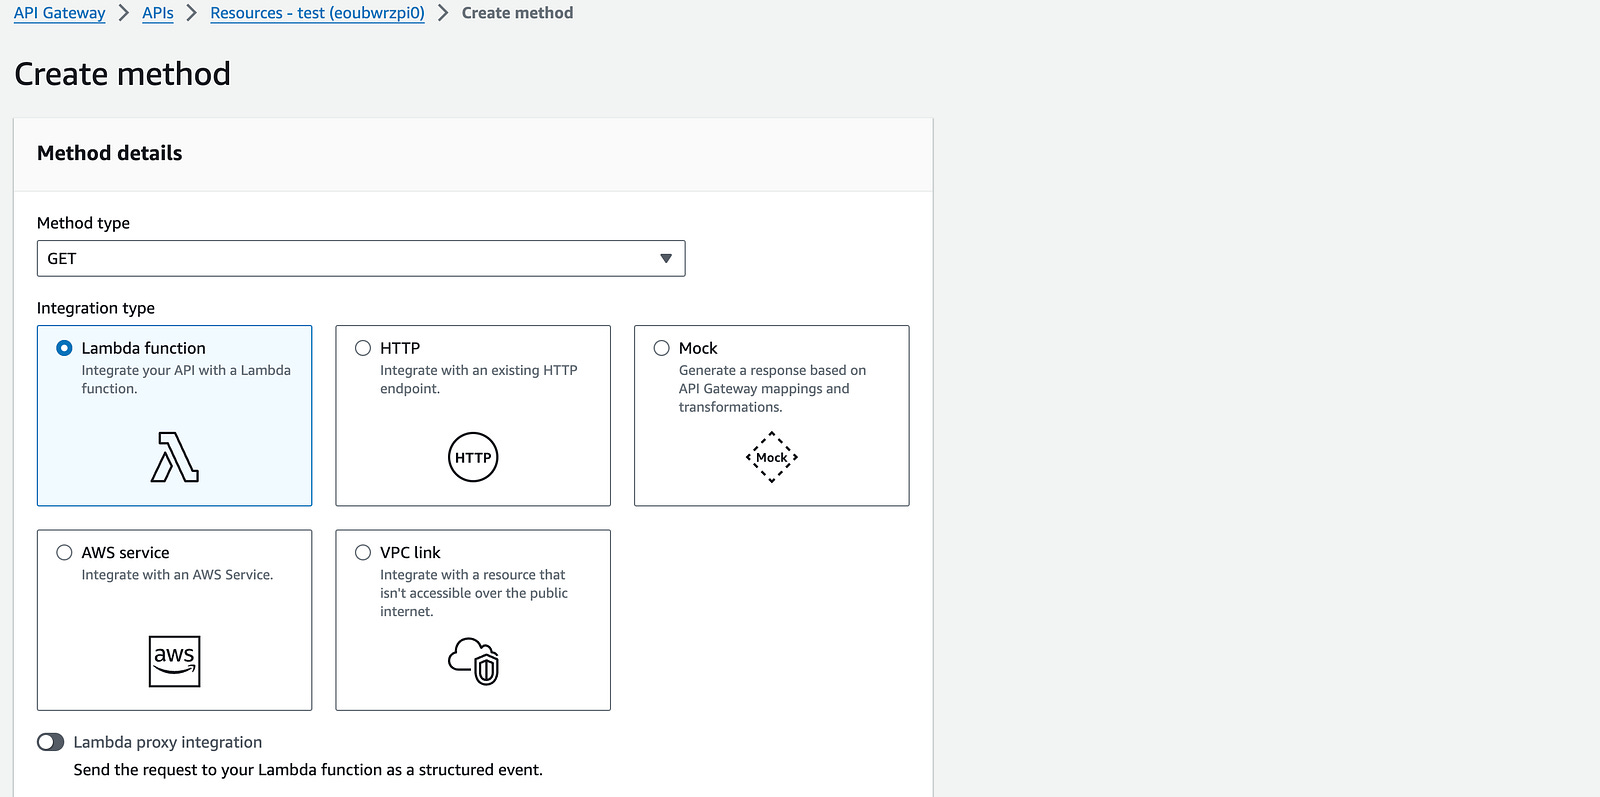
For method type we’ll choose GET and for integration type we’ll choose Lambda.
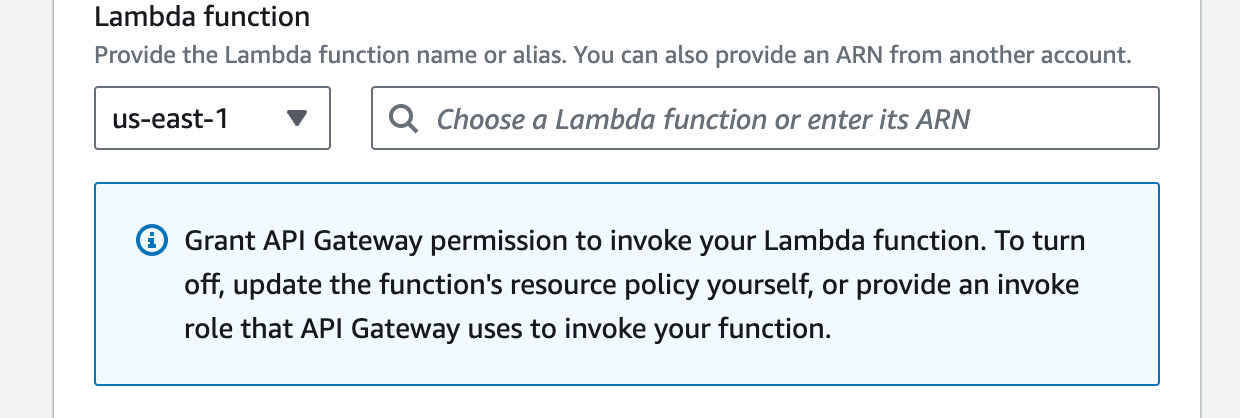
Under Lambda function we will choose any existing Lambda function. If you don’t have one created you can follow this quick guide or comment on this post for guidance.
For the Lambda code i wrote a simple method that sends a response object with a body of “Welcome to the Sports Cars API”:
exports.handler = async (event) => {
  // TODO implement
  const response = {
    statusCode: 200,
    headers: {
      ‘Content-Type’: ‘application/json’,
      ‘Access-Control-Allow-Origin’: ‘*’,
      ‘Access-Control-Allow-Headers’: ‘Content-Type’,
    },
    body: JSON.stringify(’Welcome to the Sports Cars API!’),
  };
  return response;
};
The headers object is very important to have in order to not have any CORS errors.
Once you have created your lambda function you can select it from the input under the Lambda function section:
We can leave the rest of the sections as they are and proceed to create the method by clicking on the Create method orange button at the bottom of the page.
With this method under the root path /, we will be able to route all GET requests to our API endpoint (which we’ll create later) in order to perform some action when the users invoke that endpoint.
You should now be redirected back to the API page.
It should now look like this:
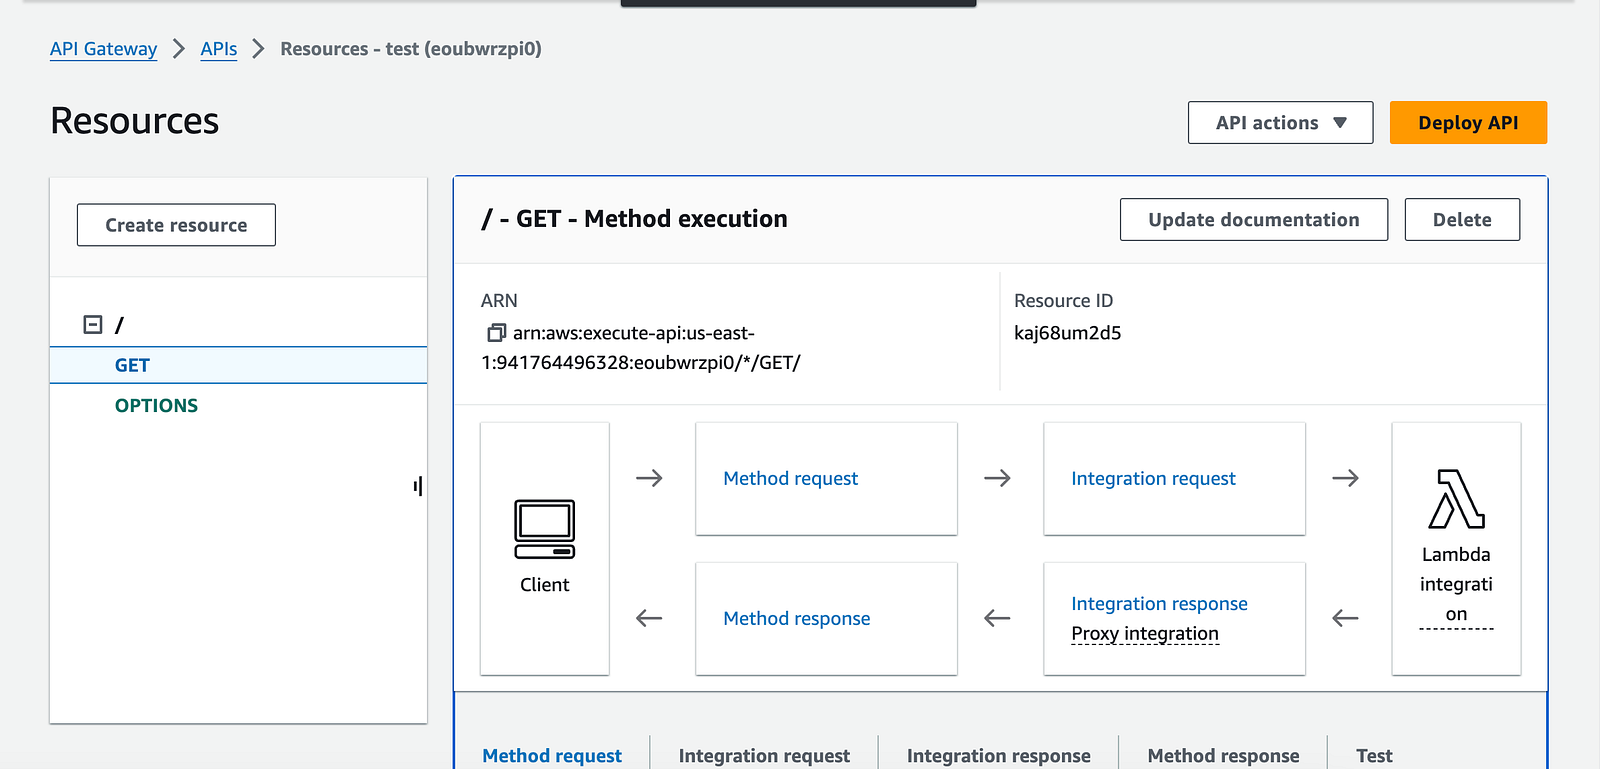
The GET method we created should appear on the left sidebar. Now before we can test our API with the “/” resource, we must enable CORS.
Most of you know how annoying and persistent CORS errors can be. If you don’t want to run into any CORS errors, follow along these next steps very precisely.
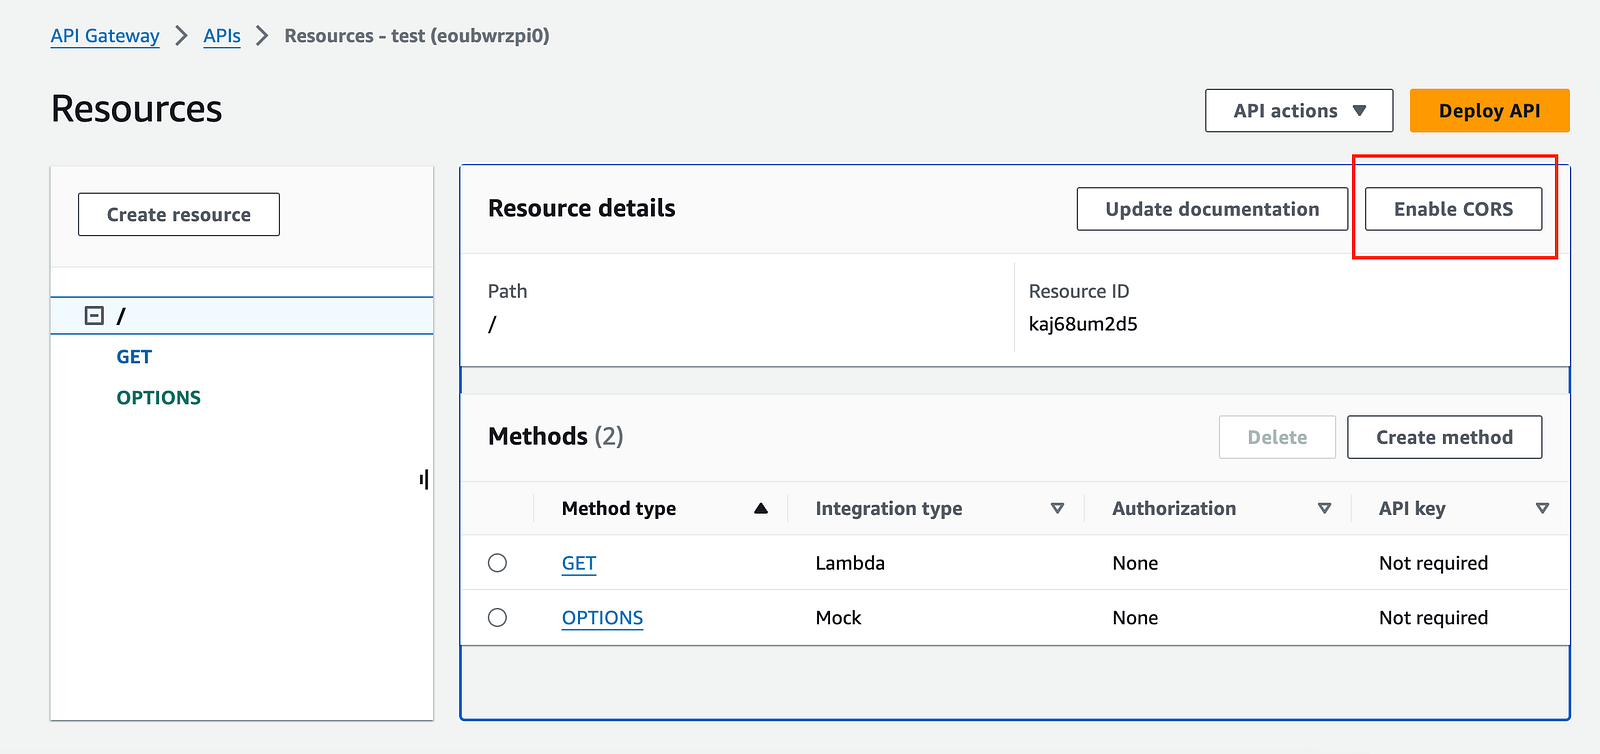
In the screenshot above, we have the GET method selected — we can see a light blue highlight over it. Instead select the “/” resource, it will be highlighted and you will see different options and buttons on the right panel next to it.
Click on Enable CORS button:
On this new page Check the GET method and add “Content-Type” under the label Access-Control-Allow-Headers. Leave the rest as it is.
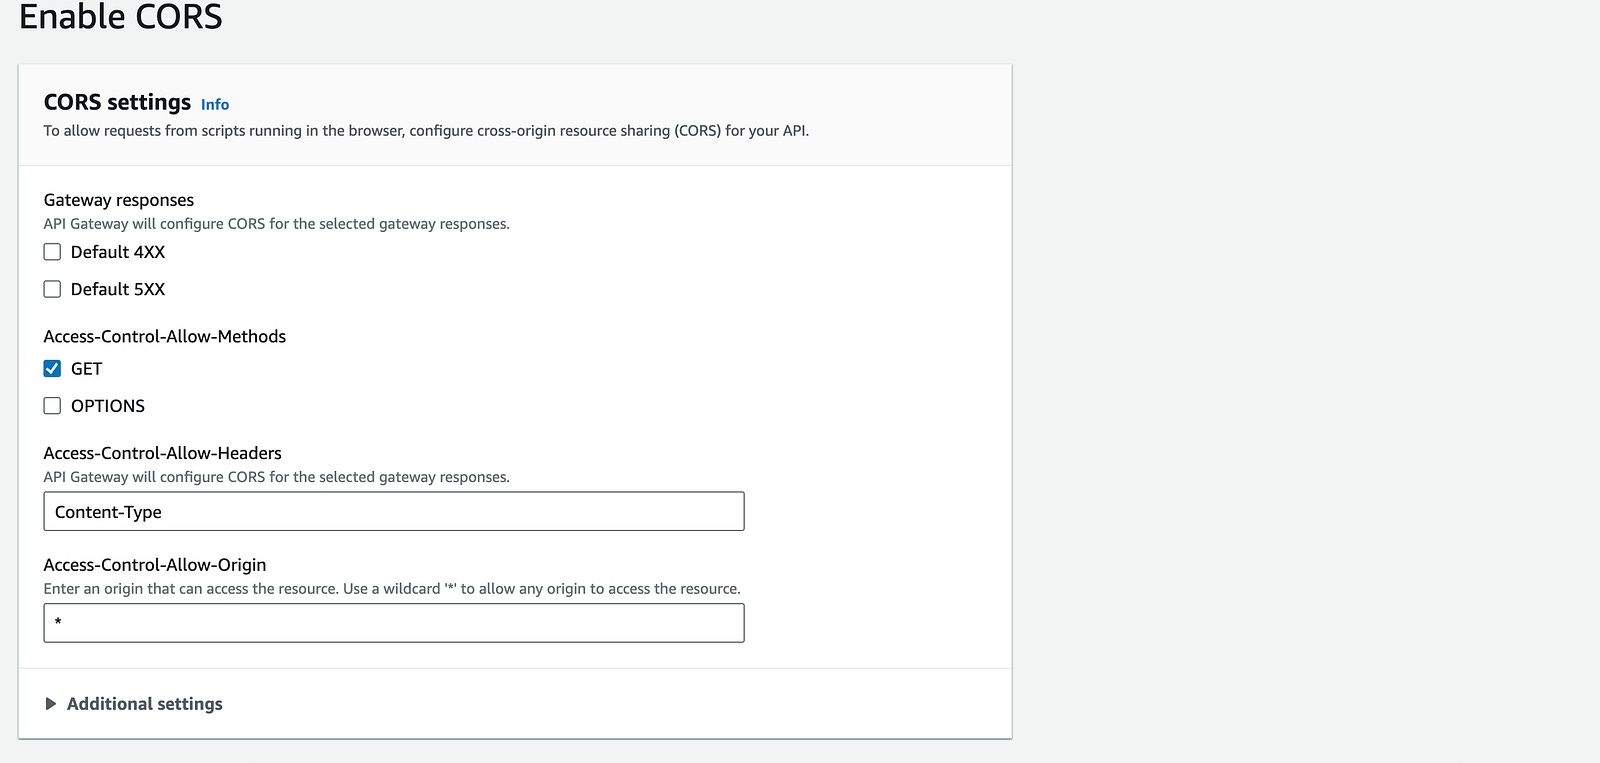
Click on Save at the bottom and you’ll be redirected to the API page.
The next step is to deploy our API into a staging environment. We can do this easily by clicking on the orange button at the top Deploy API.
Here we can select *New Stage* and name it whatever you want, i named it “v1”.
Click on Deploy.
You will now be redirected to the Staging page and on this page you will see an endpoint URL under the section Invoke URL:
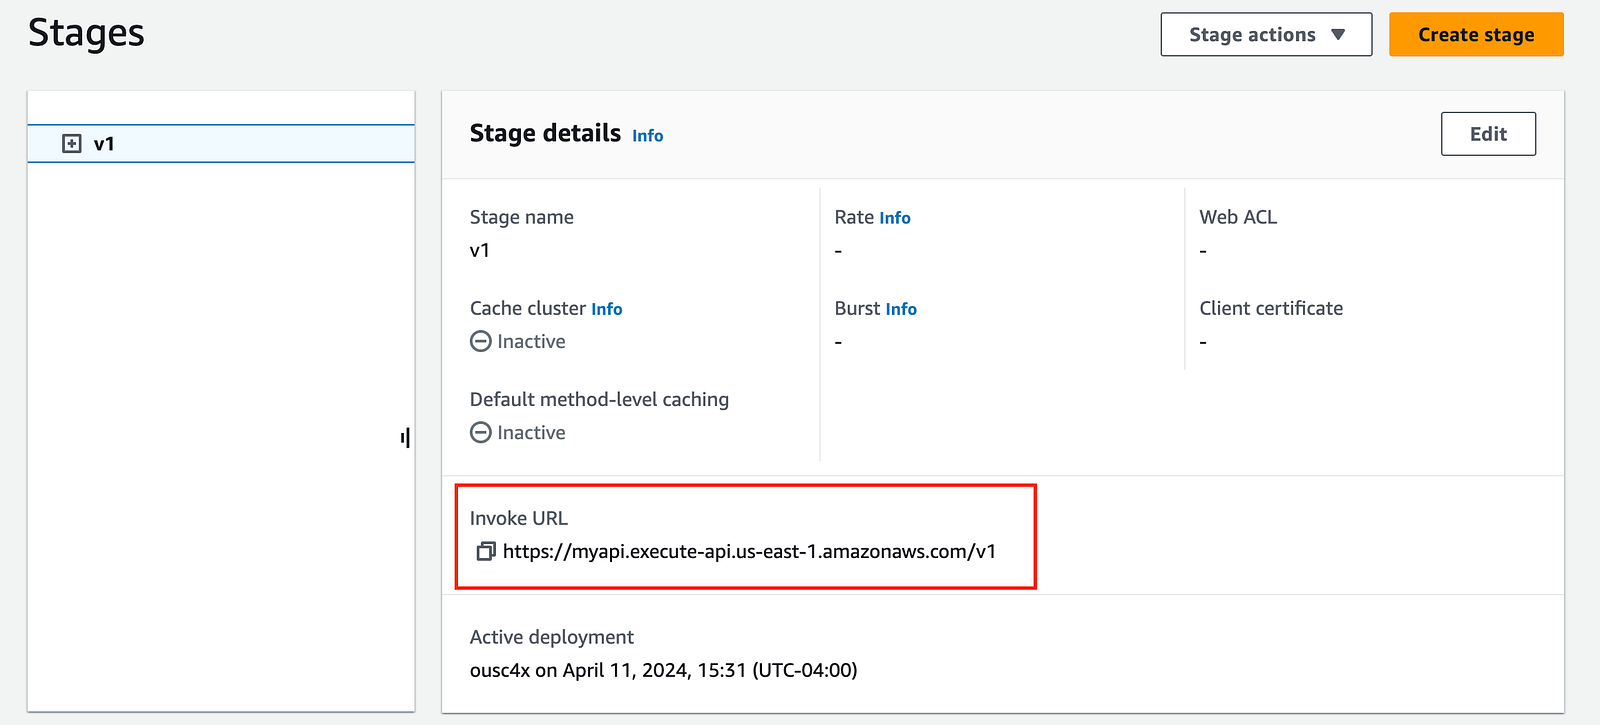
Copy that URL, we will make use of it in our front end application.
Lastly, in your frontend application create a function with a fetch call, I’m using React here so i’ll define a function with the fetch() method to call the endpoint URL:
const callAPI = async () => {
    try {
      const res = await fetch(’https://myapi.execute-api.us-east-1.amazonaws.com/v1’, {
          method: ‘GET’,
          headers: {
            ‘Content-Type’: ‘application/json’,
            ‘Access-Control-Allow-Origin’: ‘*’,
            ‘Access-Control-Allow-Headers’: ‘Content-Type’
          }
        });
      const data = await res.json()
      console.log(data)
    }
    catch(err) {
      console.log(err)
    }
  }
Pay attention to the headers object and make sure to copy that exactly as it is. This will let you avoid CORS errors once again.
Run that function and you should see the console message “Welcome to the Sports Cars API!”.
We have just created our first API endpoint.
Now we can also create more resources and add different methods to it to create more complex and powerful APIs — I’ll leave that for a future article.
Conclusion
We now know how to create and deploy a rest API for production and integrate it into our front end workload.
We also understood how to enable CORS to not have any CORS error in the process. We went through creating a rest API, adding resources and methods to route requests from our users to our endpoints.
Finally we understood how to deploy our API to production and make use of it in our front end application.
👋 My name is Uriel Bitton and I’m committed to helping you master Serverless, Cloud Computing, and AWS.
🚀 If you want to learn how to build serverless, scalable, and resilient applications, you can also follow me on Linkedin for valuable daily posts.
Thanks for reading and see you in the next one!