
How To Secure Your API Endpoints With AWS Cognito
The easiest and quickest way to secure your API endpoints in AWS

Securing your API can be a daunting task.
Especially if you aren’t experienced with security best practices.
However, with AWS all that changes. You can easily secure your API endpoints with a few clicks and not much knowledge about security.
I’ll guide you through how to do this in a few steps only.
Let’s dive straight into it!
Overview
Here’s a general overview of the process we will use to secure our API:
Create an API with AWS API Gateway and add some endpoints
Create an AWS Cognito user pool for user authentication
Create an attach JWT authorizers to our endpoints
Endpoints will only be accessible by authenticated Cognito users.
Let’s start with creating a basic HTTP API.
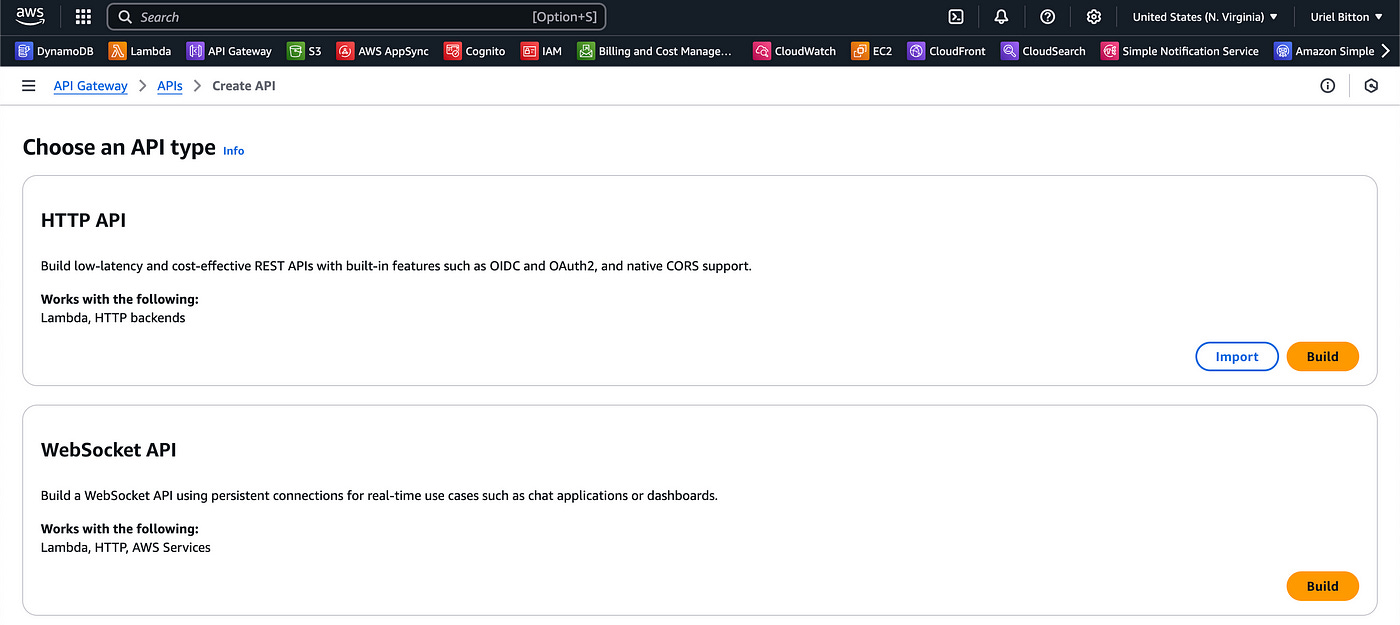
Create an API in API Gateway
In the AWS console, head to the API Gateway service.
We’ll create a new HTTP API.
Give it a name (I named mine “users-api”) and click on next.
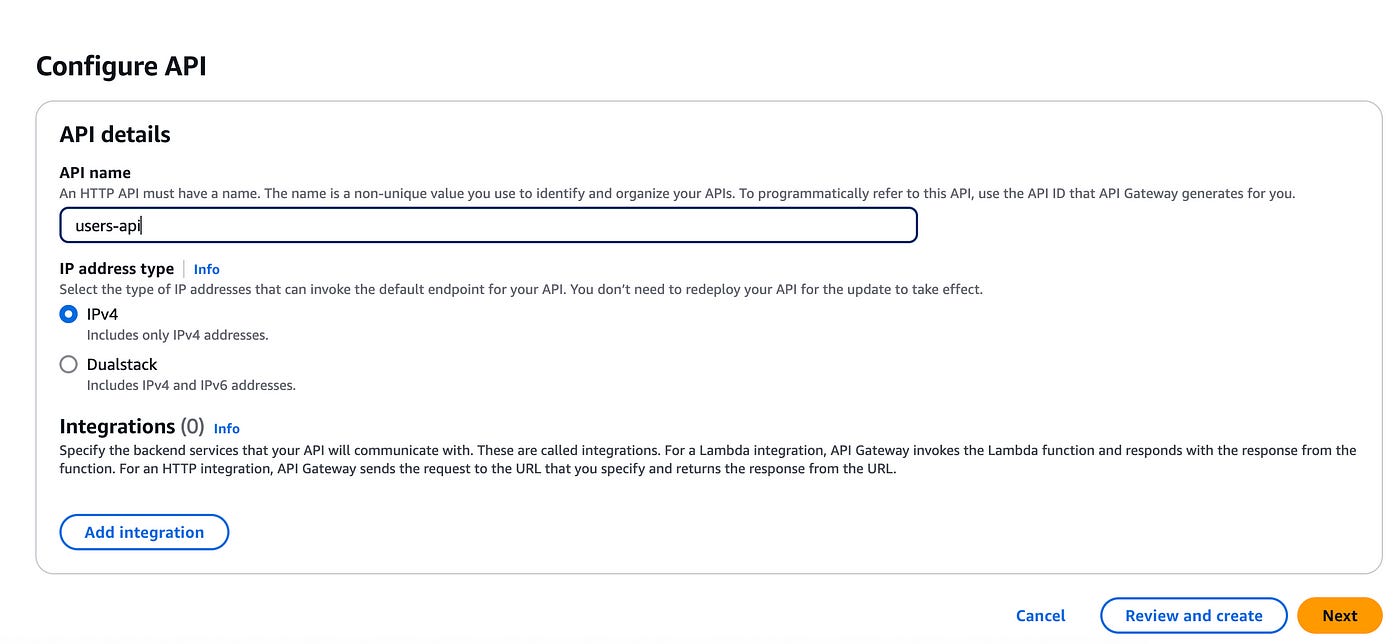
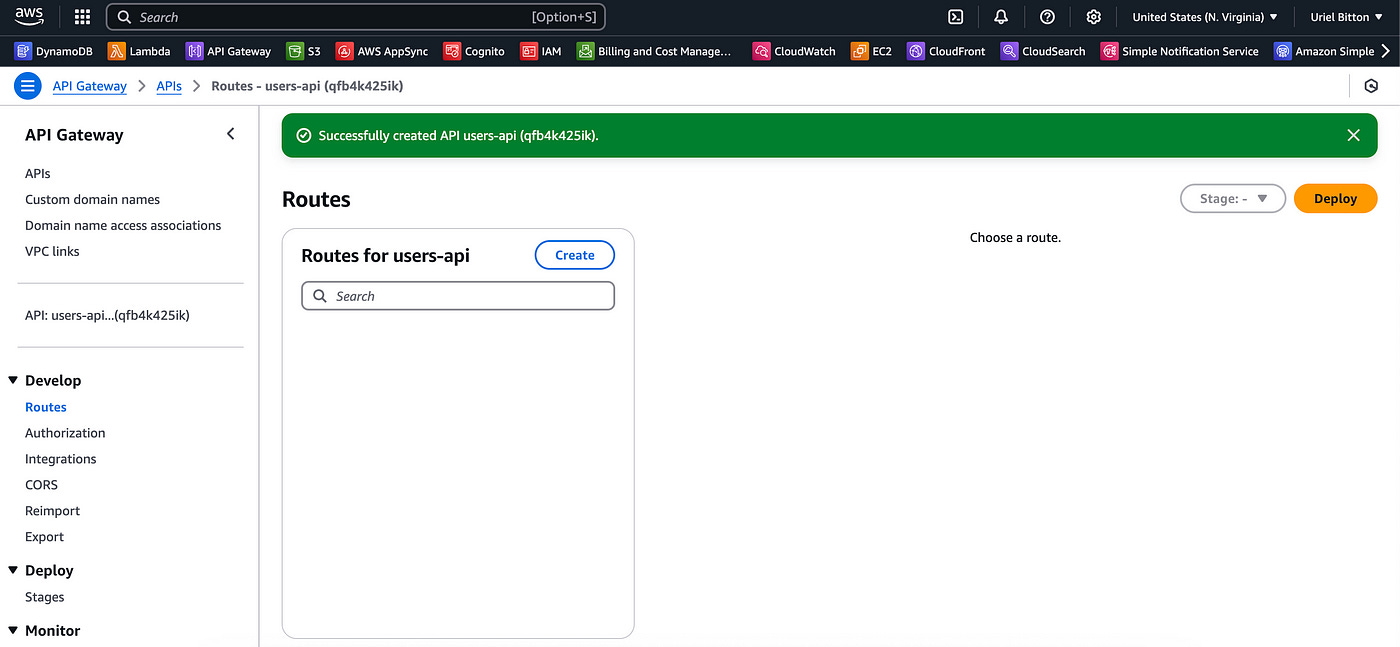
Keep on clicking next on the rest of the pages, leaving the default configurations as they are and click on Create to create the API.
You will then see this page:
Add API endpoints
Let’s now add some endpoints.
Click on the Create button under “Routes”.
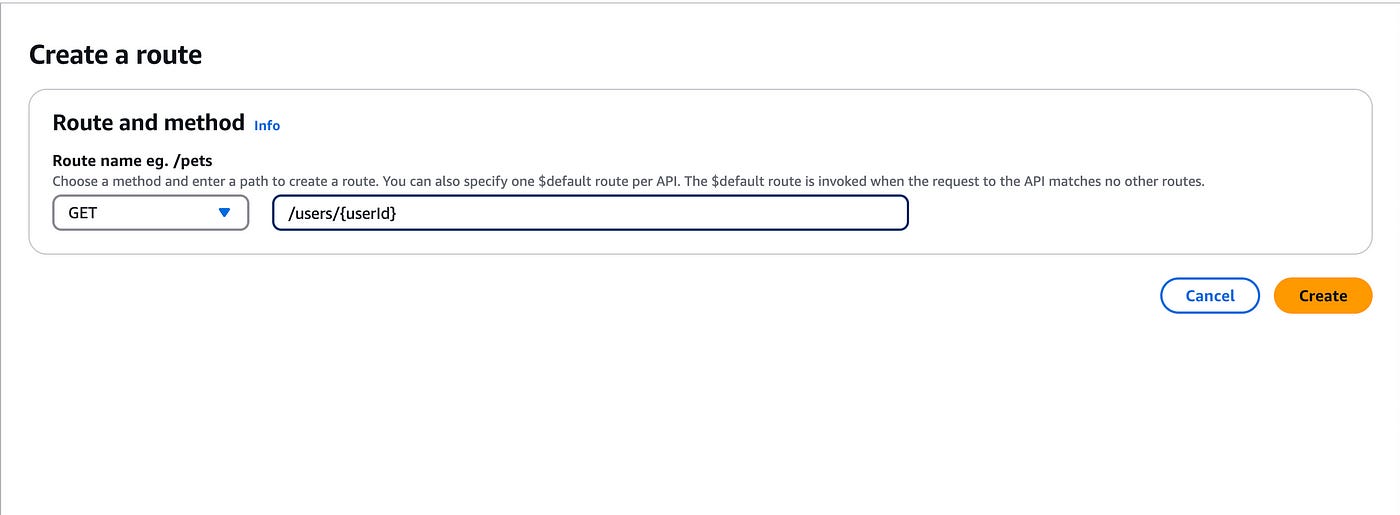
Choose GET as the method and add “/users/{userId}” as the route path.
This endpoint will serve to get a user by their userId.
Click on Create.
You will then be redirected to the routes page. Here, click on the GET item we just created. You will see the following UI:
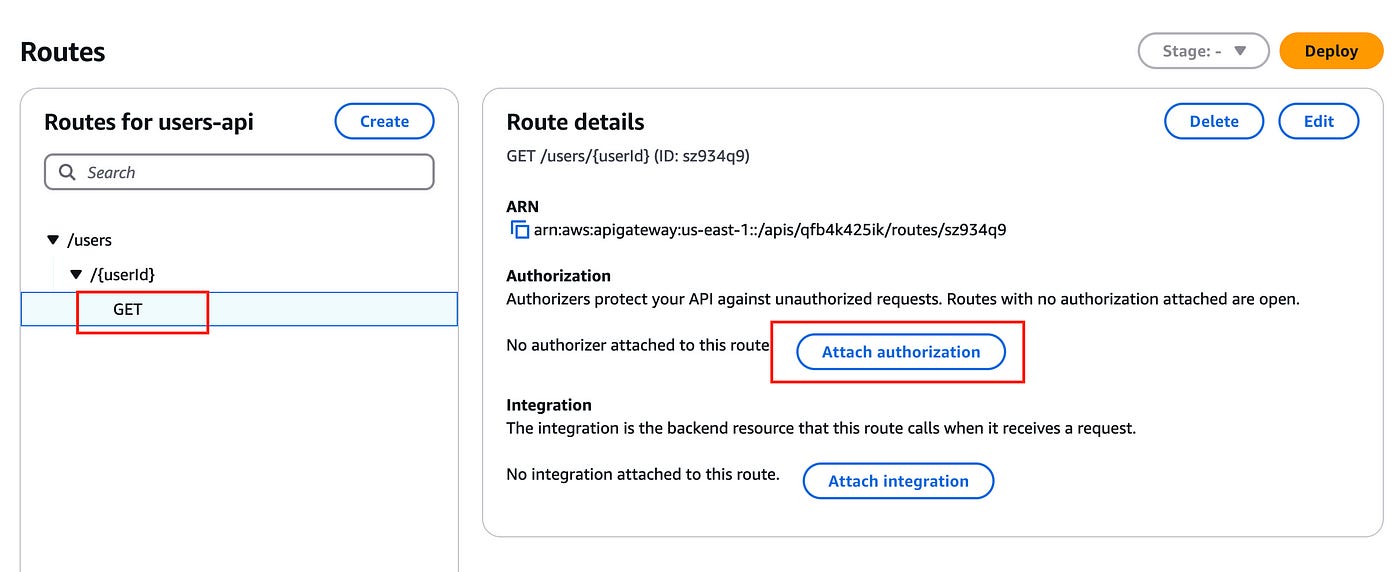
You can click on Attach authorization. This will bring up the following page:
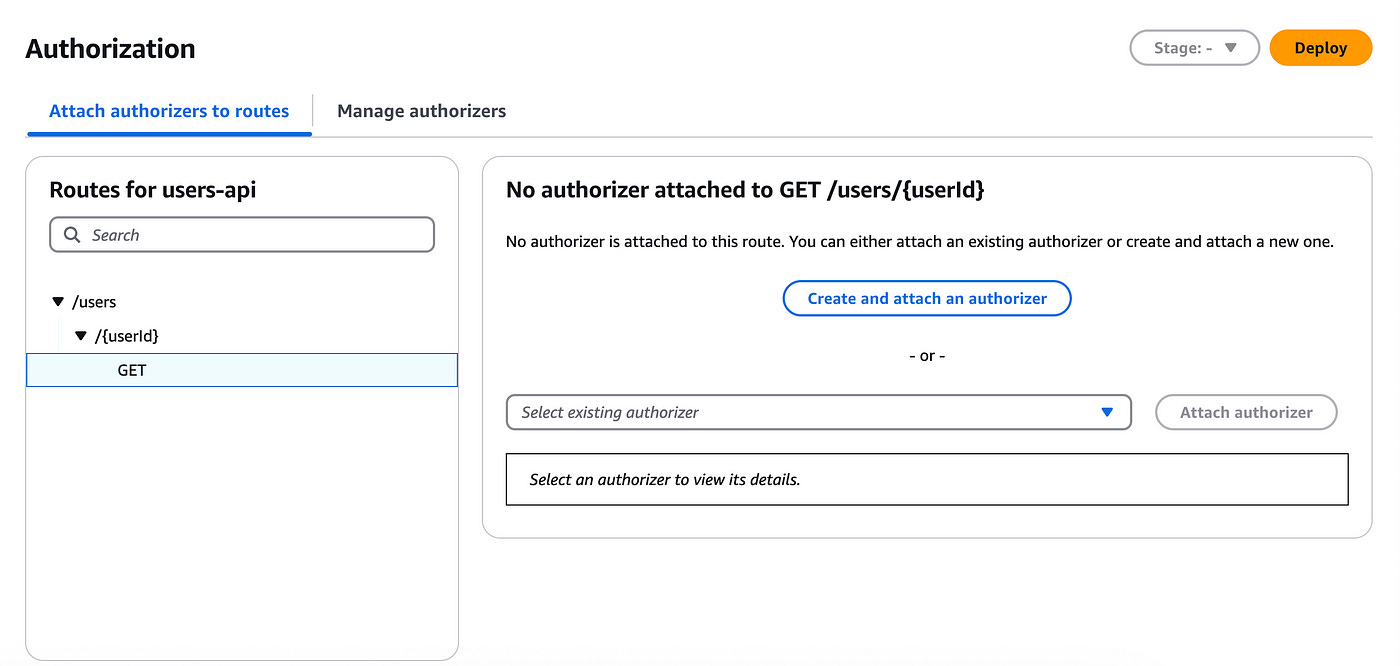
Here you can create and attach an authorizer for your endpoints.
Click on the Create and attach an authorizer button on the right hand side.
You’ll be brought to this screen:

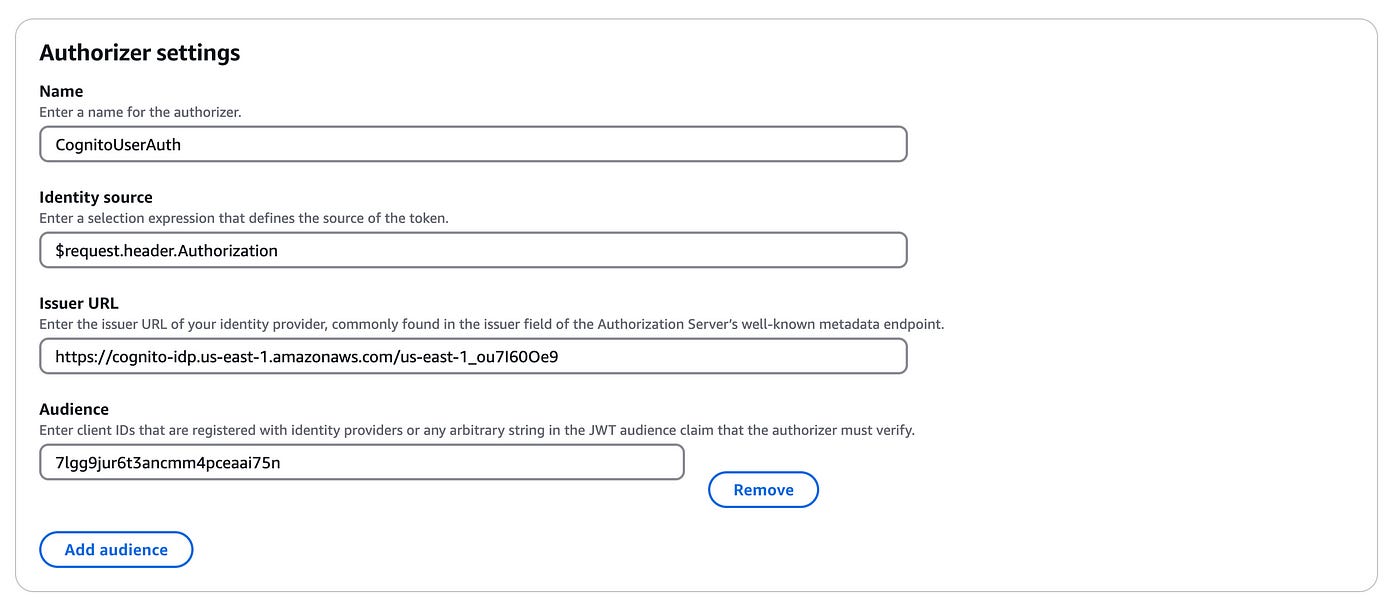
Here select JWT and use the following configuration for the Authorizer settings:
Name: enter any name (e.g. CognitoUserAuth)
Leave identity source as it is
Issuer URL: this URL always starts as “https://cognito.idp.<aws-region>.amazonaws.com/<aws-region>_<cognito-user-pool-id>*
Audience: add an audience and copy your App Client ID*
Now the missing pieces are the Cognito user pool ID and the app client ID.
To get them we need to create a Cognito User Pool.
Leave that tab open and open a new tab in AWS Cognito.
Create user pool in AWS Cognito
In the Cognito service, click on the Create user pool button.
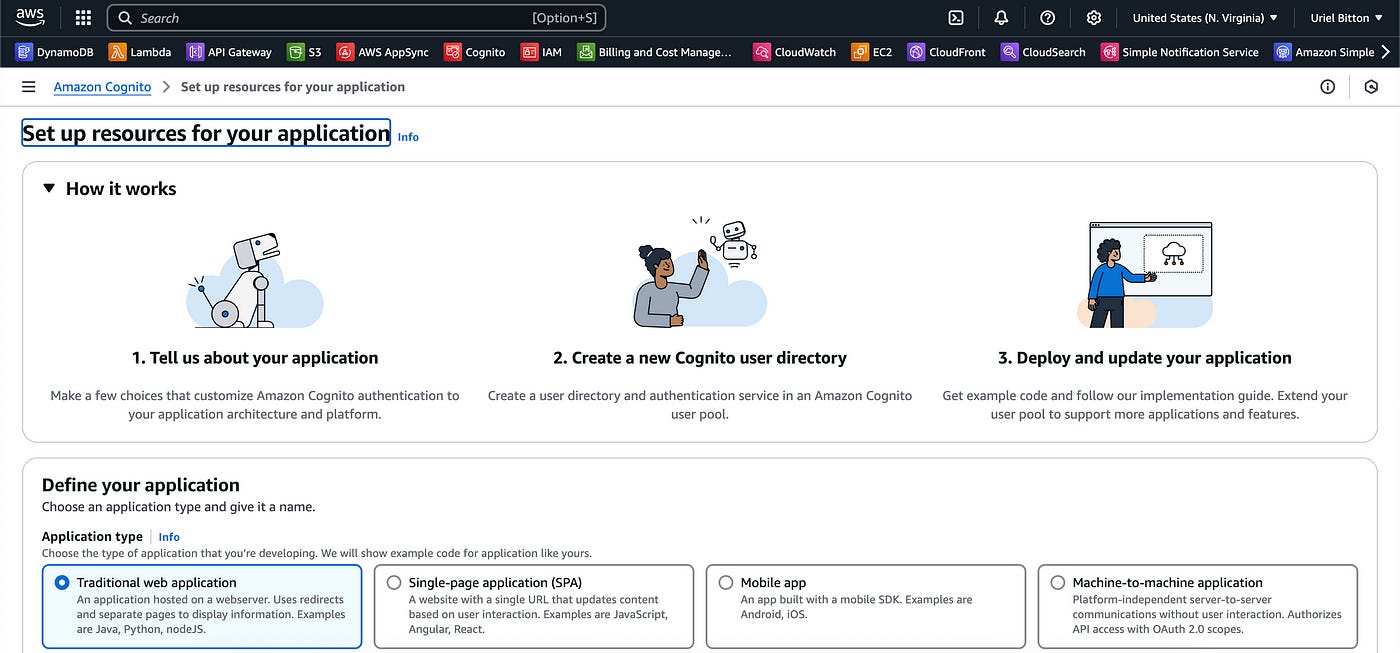
Leave the default selection “Traditional web application”.
Then below add a name to your application and select any of the options you want users to signup with (like email, phone or username).
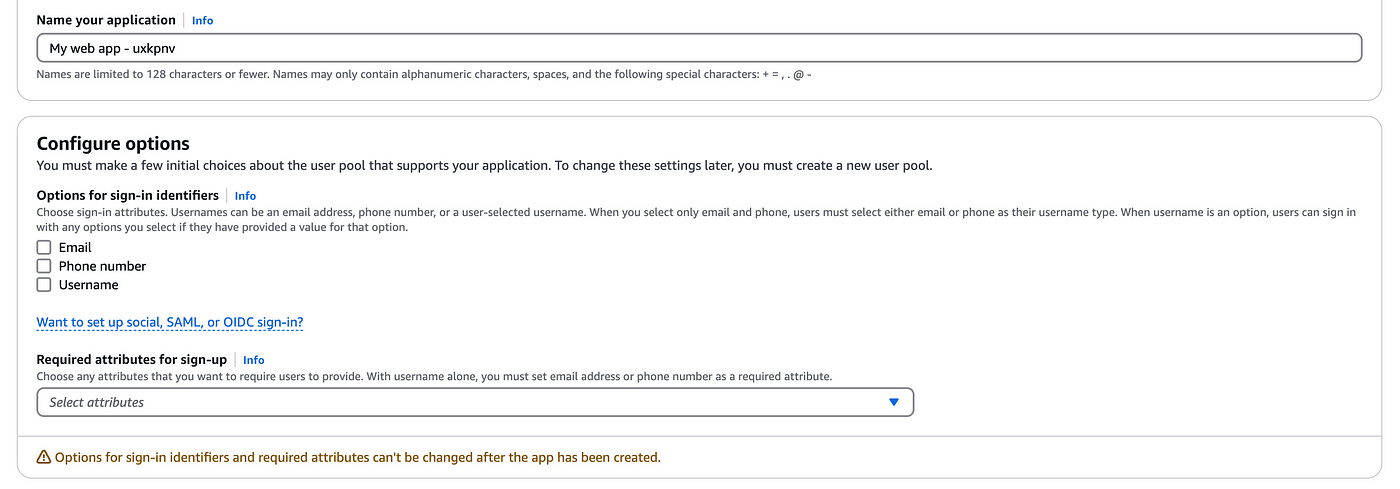
Since the rest is out of scope for this article, we’ll skip that and click the button Create user directory at the bottom.
Once you create the application, you’ll see the details of your application, such as the user pool name, user pool ID and more:
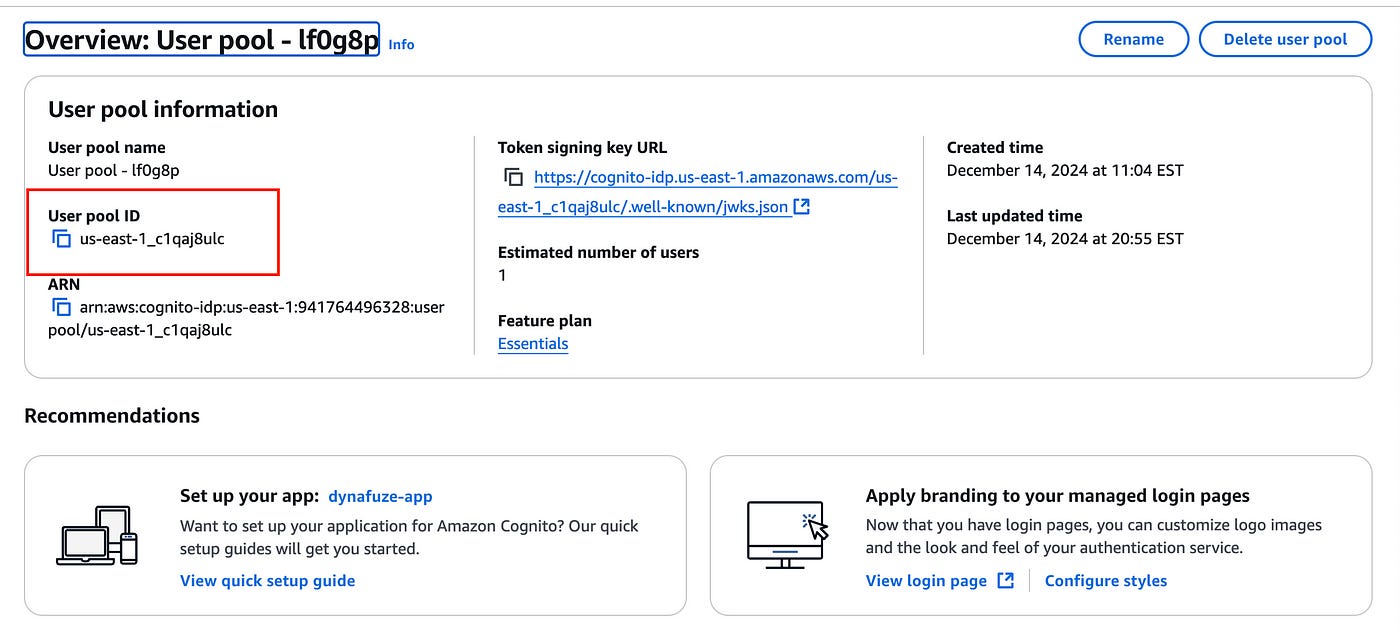
The user pool ID is the first text you need to copy and note down for the JWT Authorizer above.
For the audience client ID, head into the App clients on the left sidebar.
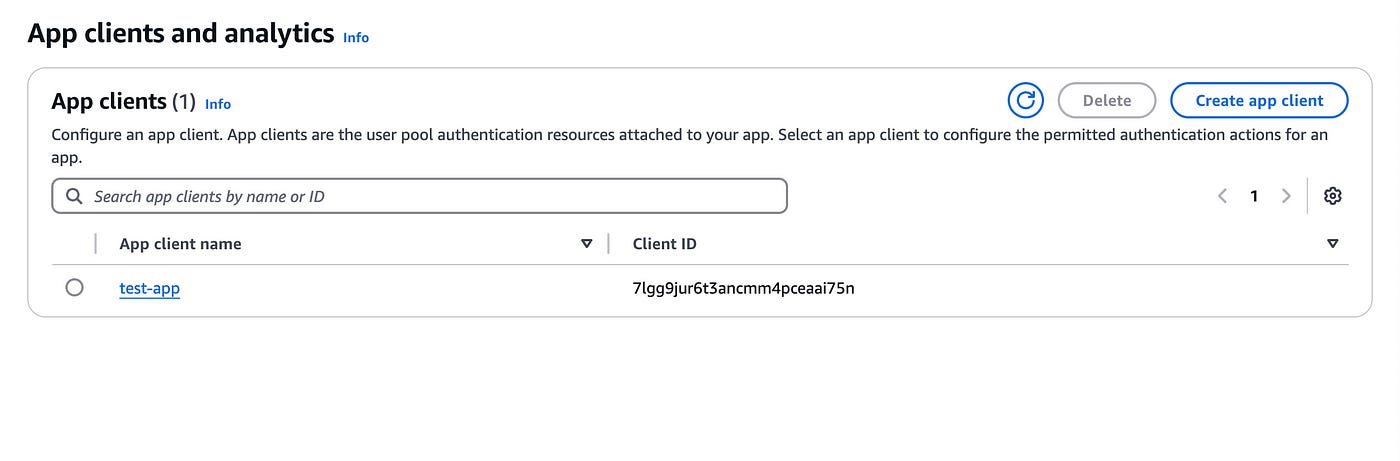
Copy and note down the Client ID here.
We’ve now got everything we need for our JWT authorizer.
Let’s now head back into our API Gateway tab.
Attach JWT Authorizer
Now you can copy the Cognito User Pool ID into the issuer URL input and the App Client ID into the Audience input.
It should look something like this:
(I’ll of course delete this Cognito pool before publishing the article)
Once you’ve done that, you can click on the button at the bottom Create and attach.
This will attach the JWT Authorizer to the GET endpoint we created earlier.
We can now test out the endpoint.
Let’s now add an integration to our endpoint.
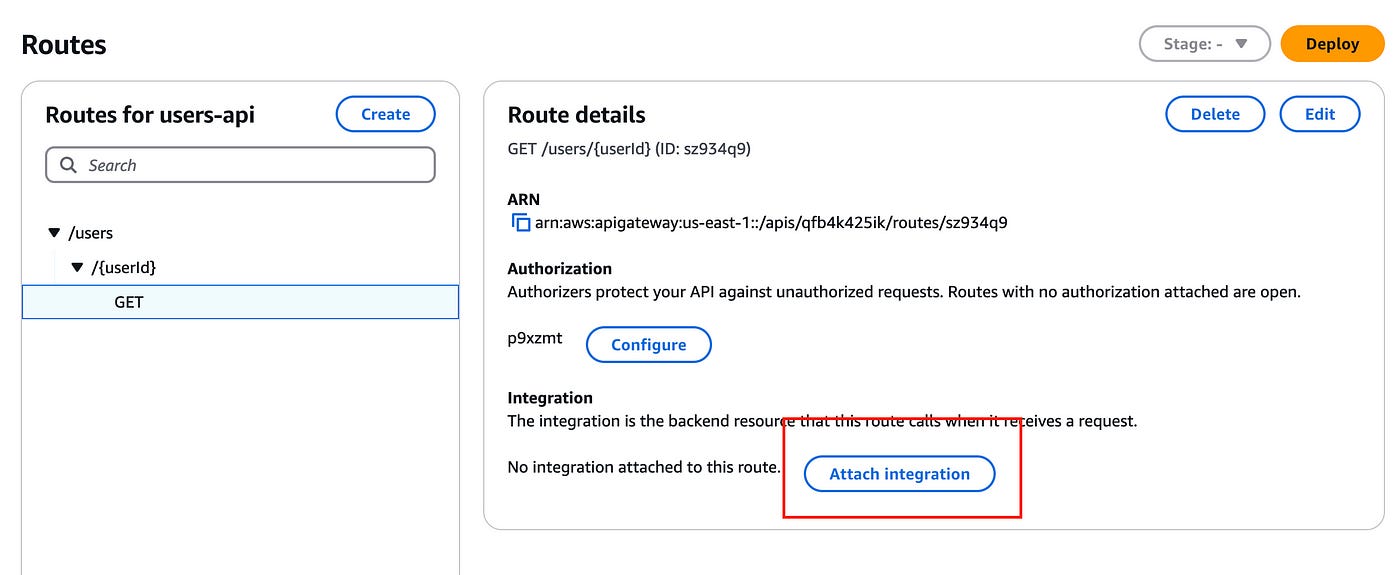
Click on Attach integration.
Our endpoint is now secure!
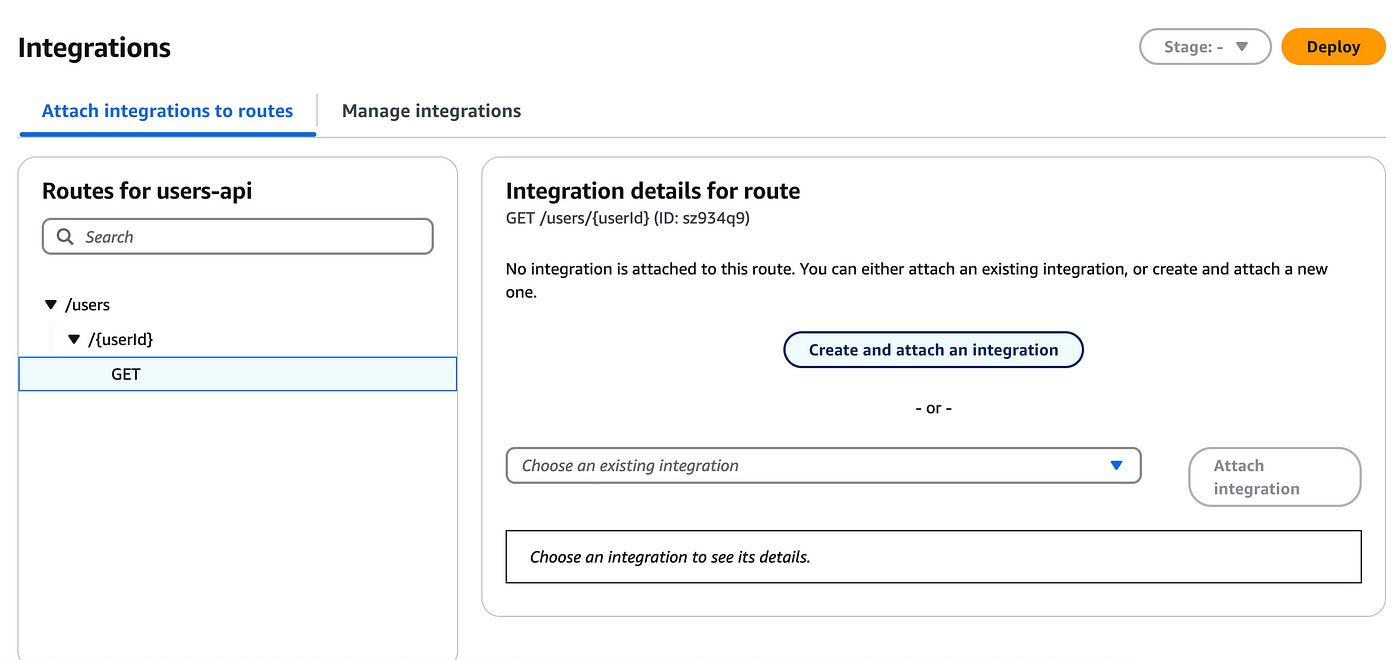
We’ll add a very basic integration to test out this JWT authorizer.
On the new page, click on Create and attach integration:
Next, on the Integration page, add an integration target and details:
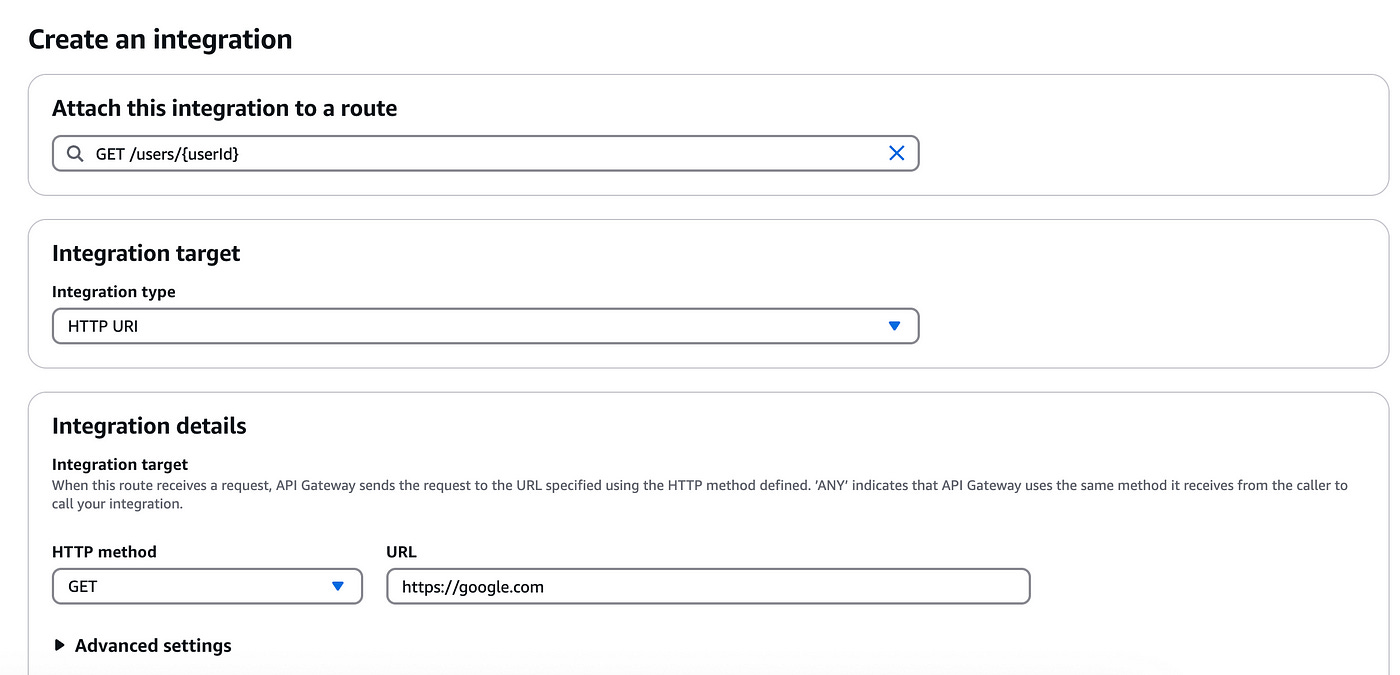
Under integration target, select HTTP URI.
Under integration details, for HTTP method, select GET and for the URL add any URL (e.g. google.com).
Click on the Create button.
You’ll be redirected to the following page:
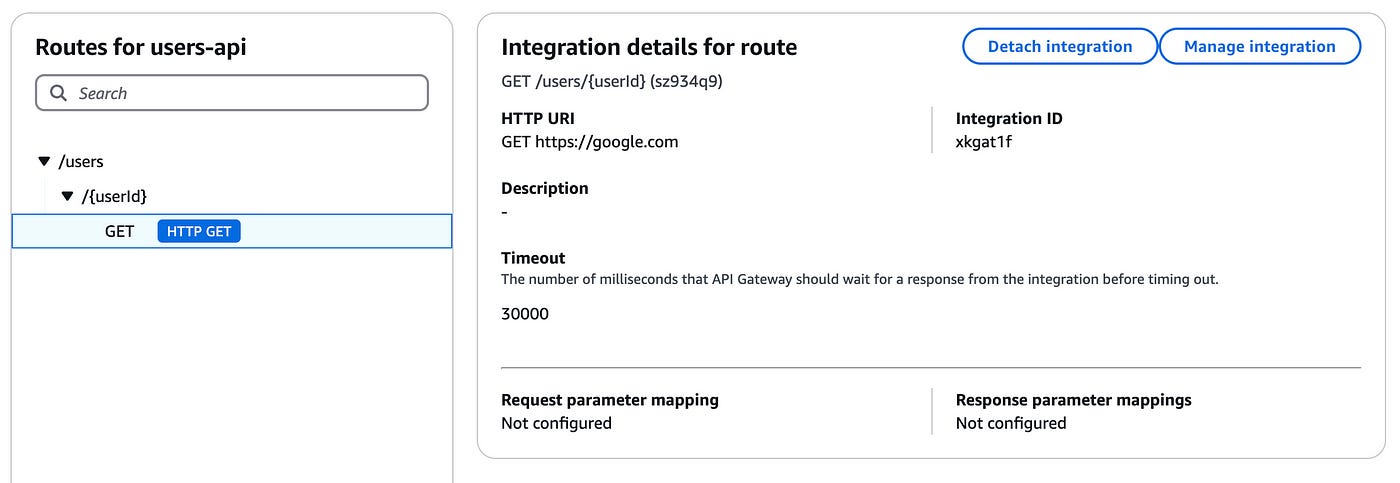
The blue badge on the GET method shows the path has an HTTP integration.
Next we’ll test out the endpoint to see if the authorization works.
Result
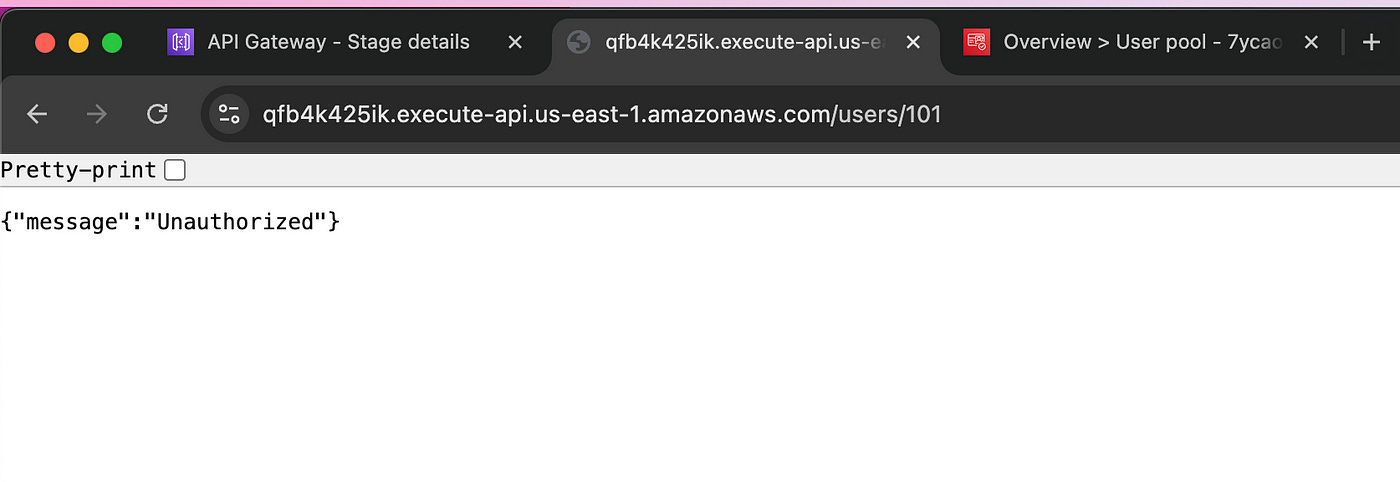
To test this authorization, let’s call the endpoint without a JWT token.
To get our API’s base URL, head over to the Stages page, on the left sidebar in API Gateway:
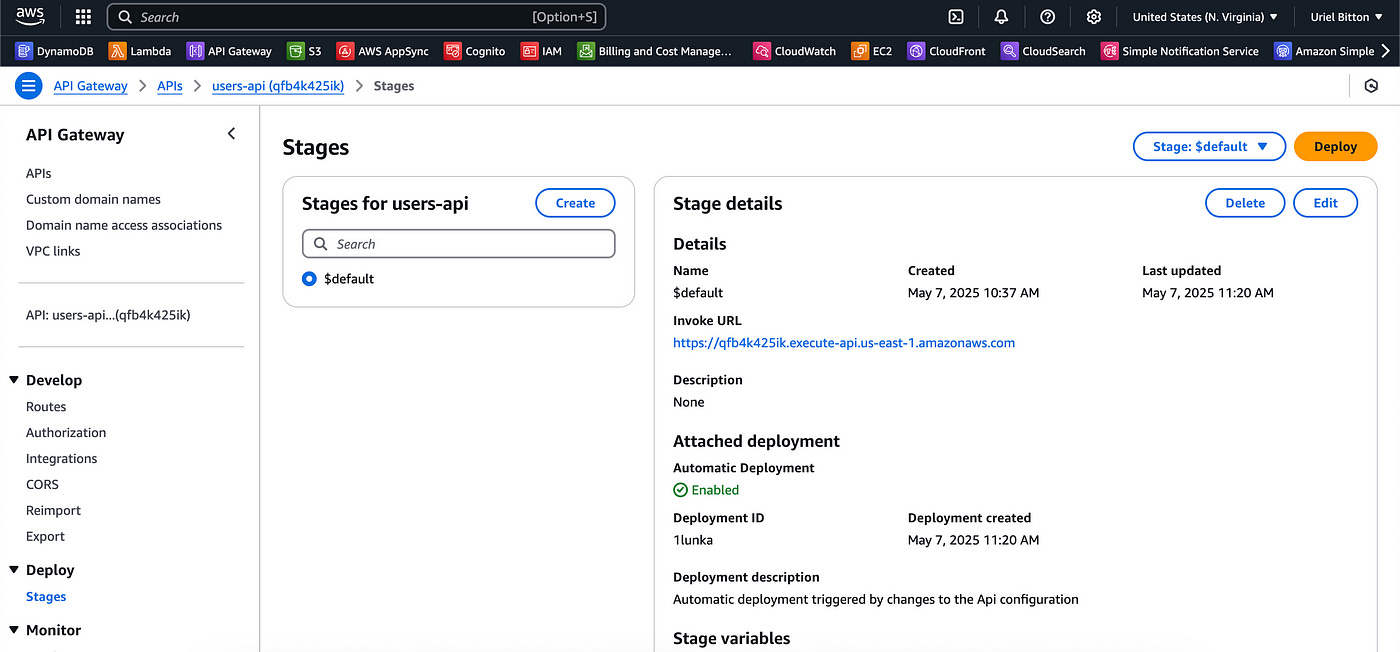
The Invoke URL is displayed in blue.
Click on that URL and add the endpoint we created in your browser.
It should look like this:
https://qfb4k425ik.execute-api.us-east-1.amazonaws.com/
users/101
If I enter this URL into my browser I’ll get the following error message, which indicates my authorizer is working well.
Summary
Securing your API Gateway endpoints using AWS Cognito is simple and straightforward. The process we went through was creating an API with API Gateway, then creating a user pool in Cognito, and creating and attaching a JWT authorizer to our endpoints.
This protects our endpoints from being called by anyone not authenticated with AWS Cognito.
👋 My name is Uriel Bitton and I’m committed to helping you master Serverless, Cloud Computing, and AWS.
🚀 If you want to learn how to build serverless, scalable, and resilient applications, you can also follow me on Linkedin for valuable daily posts.
Thanks for reading and see you in the next one!