
The Ultimate Guide To Getting Started With DynamoDB
Learn how to build scalable, resilient, and high-performing NoSQL databases.


What Is DynamoDB?
DynamoDB is a fully managed NoSQL key-value datastore by AWS, capable of high availability and scalability.
It is designed to support large amounts of data and high request rates.
DynamoDB is also a serverless database and manages the underlying server and maintenance tasks for you.
Under the hood, DynamoDB partitions your data into different storage nodes, each storage node has two other copies enabling high availability and durability of your data.
Separating your data into multiple storage nodes makes it highly scalable.
Let’s understand how this works by looking at the basics first.
DynamoDB Basics
A database in DynamoDB can have as many tables as you need. Each table can store multiple items inside.
Being a key-value database, DynamoDB operates slightly differently than document-based NoSQL databases.
In a key-value database, each item in your table is identified by a key. A query that matches this key will return a value.
In simple terms, a key (or primary key) comprises of a partition key and a sort key. The partition key identifies a single or multiple items that share the same key, while the sort key is used to sort these items.
Query Methods
There are two main query methods in DynamoDB:
Scans
Queries
Scans allow you to query for items in your table by specifying any attribute that match your query. However, Scans are highly discouraged in most cases. It is best to learn when and when not to use them.
A Scan will go through every item on your table, resulting in a less efficient and more costly query.
Queries on the other hand are the method you will use for the large majority of the time, and the de facto method of querying data in DynamoDB.
With Queries, you can only use the primary key (partition and optionally sort key) to fetch items. The primary key cannot be changed after the table has been created.
Essentially, any query that uses a non-key attribute will return an error.
This is because of the way key-value databases are designed.
To query for items using other attributes, you need to create an index.
Indexes
There are two types of indexes in DynamoDB:
Global Secondary Indexes (GSI)
Local Secondary Indexes (LSI)
Indexes are used to satisfy different data access patterns.
Earlier we mentioned that only primary keys can be used to query items in your table. To query items using other attributes we must create an index and specify the attribute you want to query with as the partition and optionally sort key.
An index is a replica of your base table, fully managed and synced by DynamoDB.
The difference between GSIs and LSIs is that with LSIs your index uses the same partition key as the base table but with a different sort key. A GSI uses a different partition and sort key entirely from the base table.
This gives the GSI a lot more flexibility.
However GSIs add to your costs while LSIs incur no extra costs.
For a deep dive into global secondary indexes in DynamoDB, I recommend this article.
Working With DynamoDB
Let’s start by logging into our AWS account and navigating to the DynamoDB service.
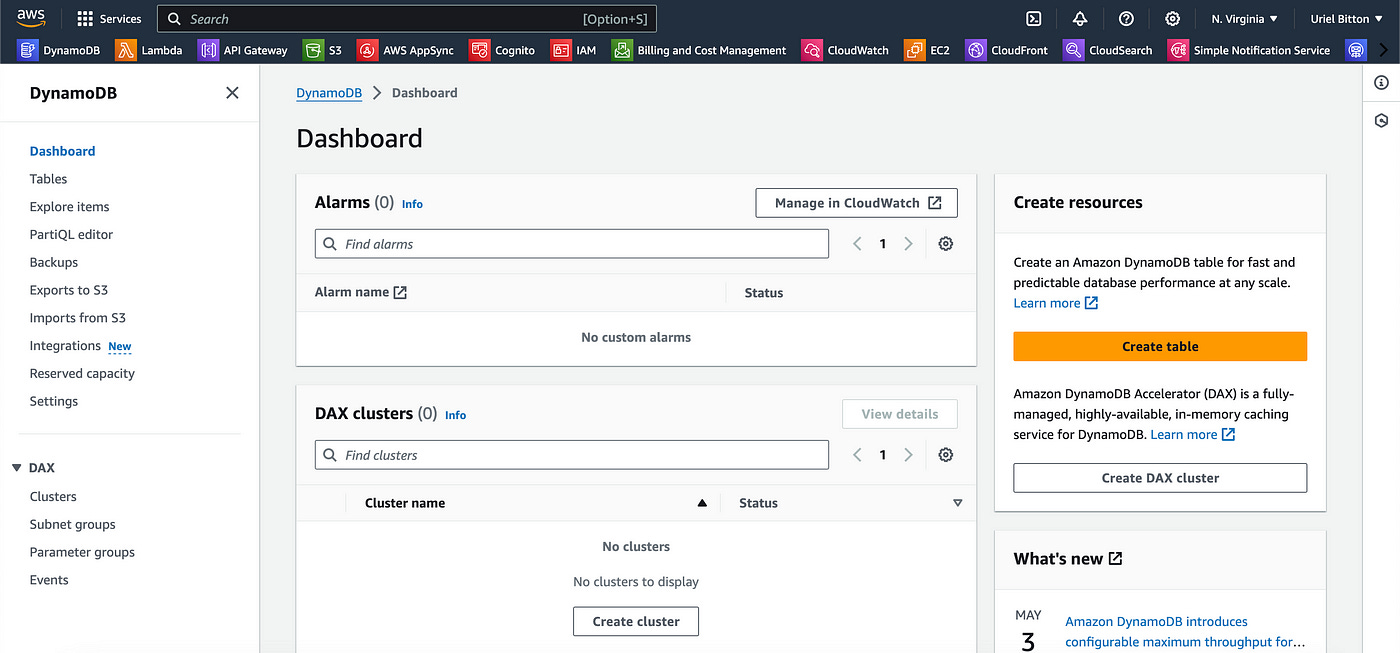
Click on Create table to create a new database table.
On the create table page, enter a name for the table. You’ll also see a field to define the partition key and optionally, a sort key for this table.
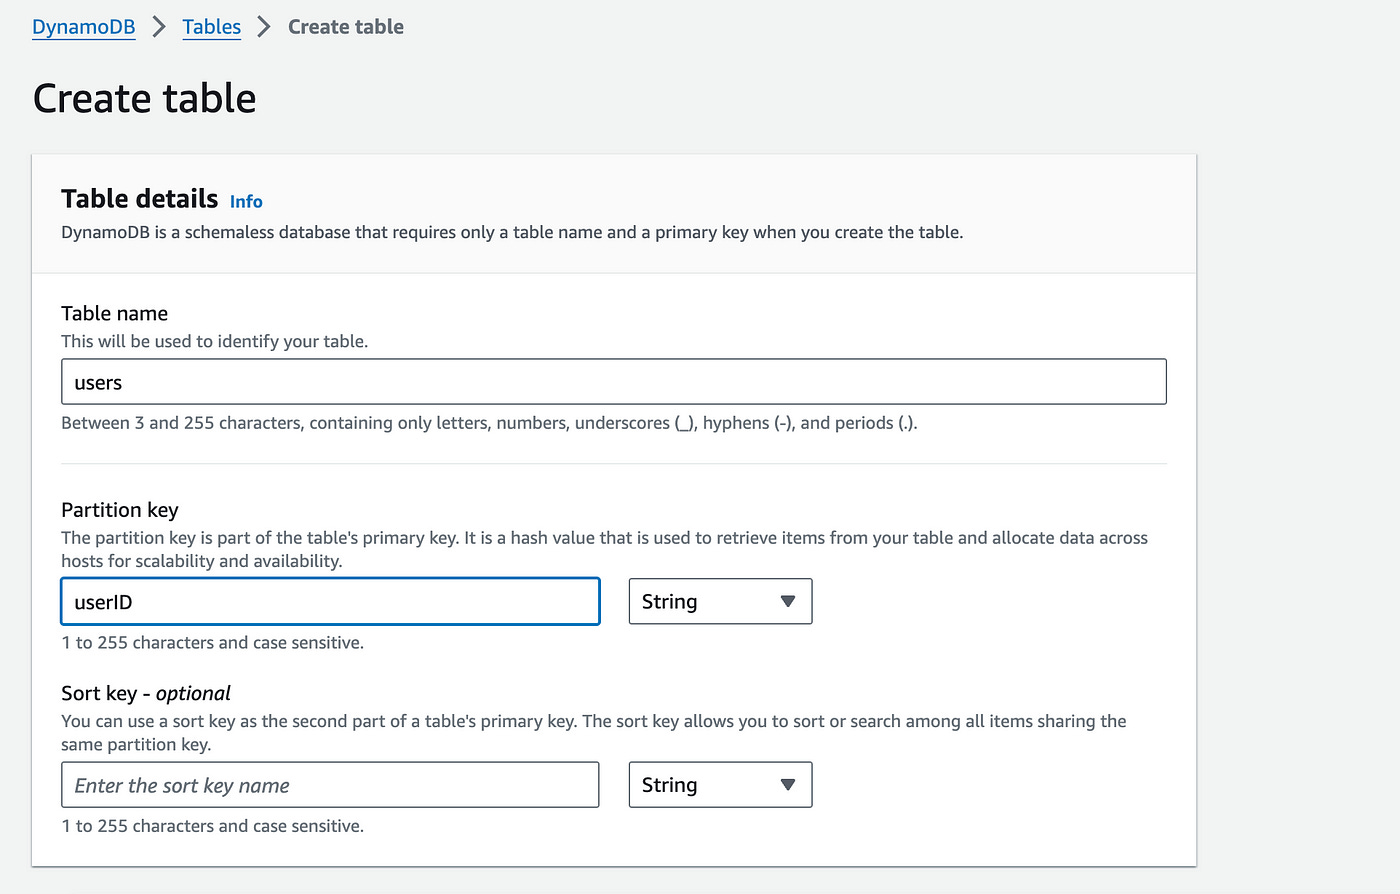
Leave the table settings for now — we’ll come back to these later.
You can now create the table below.
Before you start using your DynamoDB database, you need to understand and practice these 3 basic concepts:
Modeling data for a 1–1 relationship
Modeling data for a 1-many relationship
How to write/delete data
1–1 Relationship Data Modeling
This is the easiest task by far and it doesn’t change much compared to other databases.
Here we need to fetch a single item by providing its primary key.
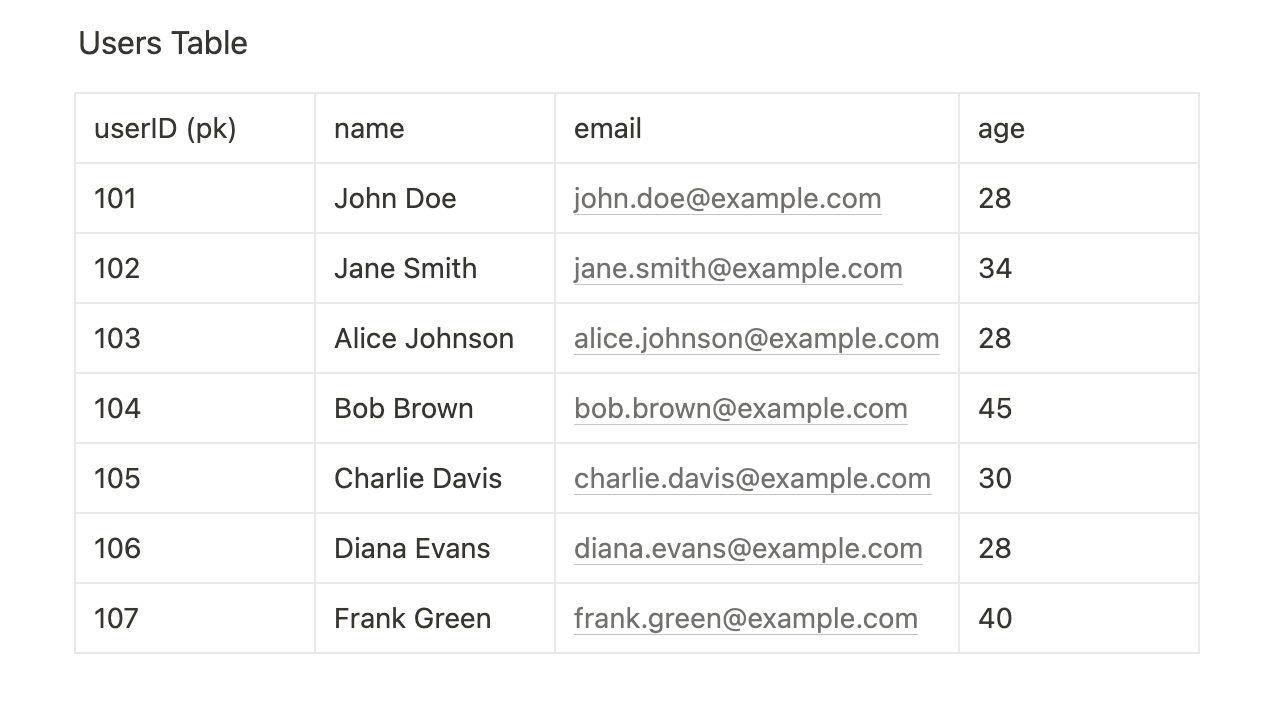
Let’s see what our initial table looks like:
To query for any single user here we can execute the following query:
const params = {
  TableName: 'users',
  KeyConditionExpression: 'userID = :userID',
  ExpressionAttributeValues: {
    ':userID': "101",
  },
};
We are doing 3 things here.
First, we define our table name, which we will name “users”.
We then define the KeyConditionExpression. Notice in the screenshot of the table model above, I have labeled the userID key as pk. Since userID is our partition key (pk) we must mandatorily use this to fetch any item in this table.
Therefore the userID key must be present in the KeyConditionExpression. The expression evaluates if any item with userID matches.
Below we use the ExpressionAttributeValues to initialize the actual value of the key expression “:userID” to “101”.
This will return the first item in our table above.
1-many relationship
To fetch multiple items from this table would be impossible.
Think about it and you’ll realize that fetching more than just one item cannot be done since each user item has a different userID value.
Let’s say we wanted to fetch all users whose age is equal to 28. We cannot simply query this table for “age = 28”. We can only use primary keys to query for data and age is not part of our primary key.
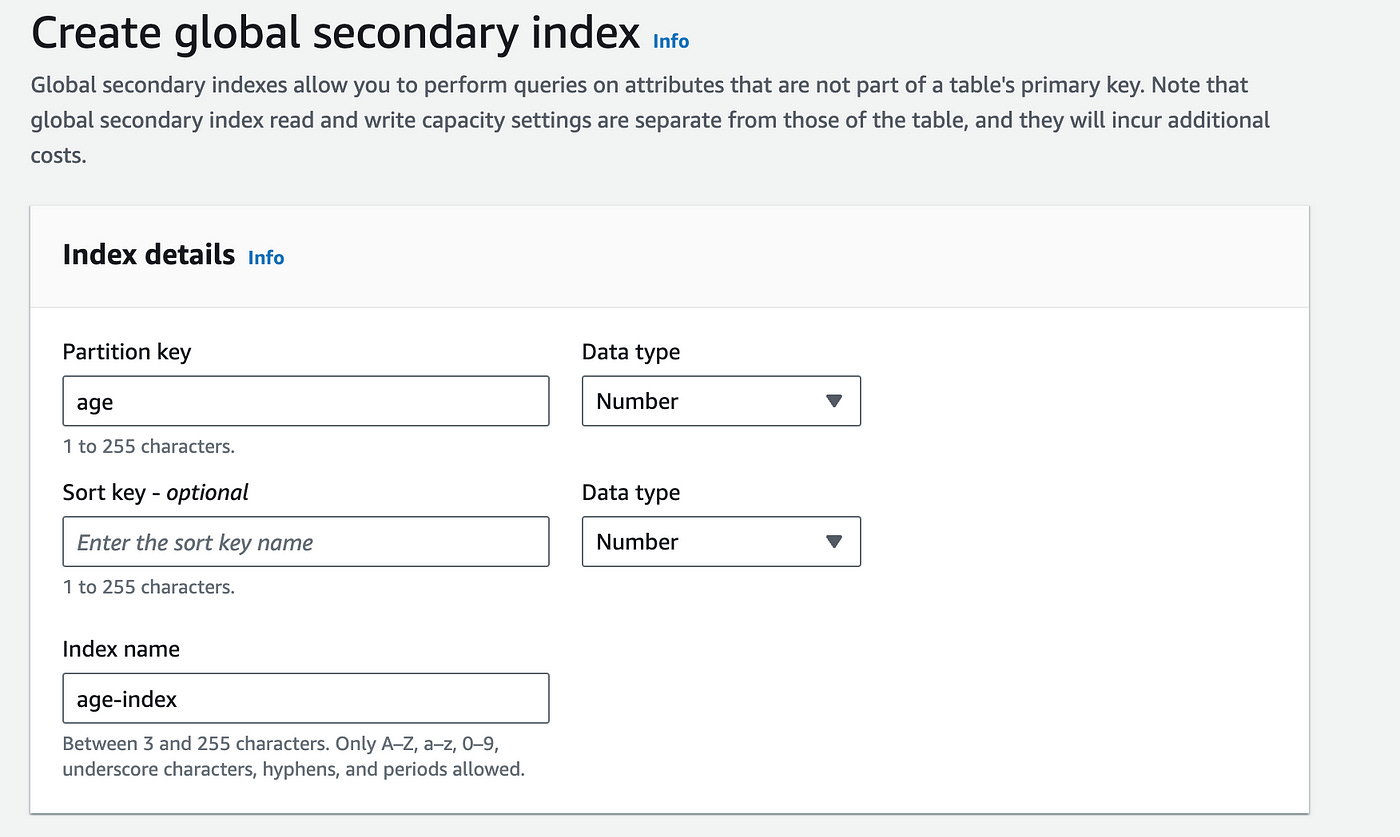
Instead, we must create a global secondary index.
In our database table page under Indexes, click on create index.

Let’s define the partition key of our index as age.
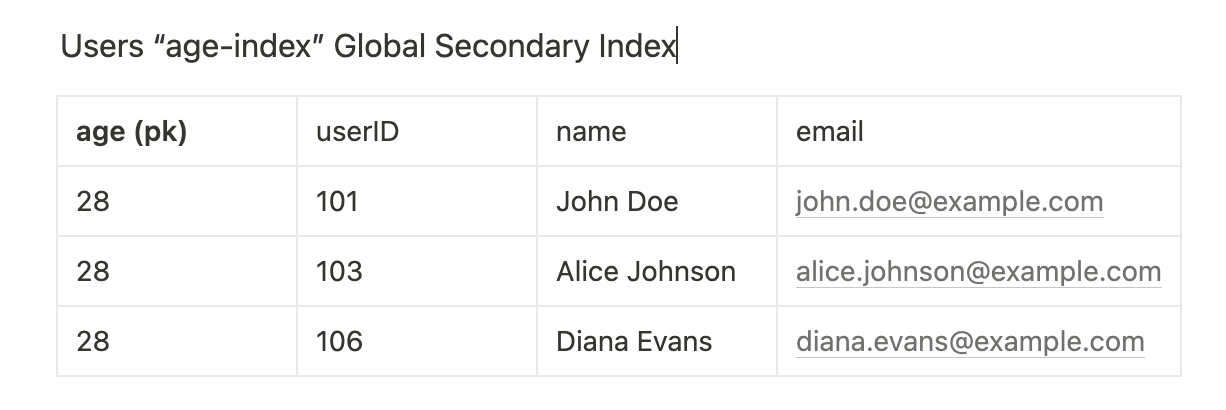
Once our index has been created we can now query this index for multiple users whose age is equal to 28.
const params = {
  TableName: 'users',
  IndexName: "age-index", //specify index name in params object
  KeyConditionExpression: 'age = :age',
  ExpressionAttributeValues: {
    ':age': 28,
  },
};
We specify the index name of the GSI we just created. Our Global secondary index will contain an exact replica of the data from our base table.
When we query our index for all users whose age is equal to 28, we will get back the following 3 items:
How to write/delete data
Now we know how to read data, let’s take a look at how we can write, update, and delete data
Writing Data
Using the PutCommand we can easily write items to our table.
import { DynamoDBClient } from "@aws-sdk/client-dynamodb";
import { PutCommand } from "@aws-sdk/lib-dynamodb";

const client = new DynamoDBClient({ region: "your-region" }); //e.g. us-east-1

const putItem = async () => {
  const params = {
    TableName: "users",
    Item: {
      userID: { S: "201" },
      name: { S: "Jake Reese" },
      email: { S: "jake@gmail.com" },
      age: { N: 40},
    },
  };
  const data = await client.send(new PutCommand(params));
};

putItem();
In the code above, we start by importing the AWS SDK DynamoDB client libraries. We instantiate the DynamoDBClient with the region where our database was created.
In the putItem function, we define a params object with our table name (“users”) and an item.
Our item object must contain our primary key — in this case, the userID attribute — as well as any other optional attributes we wish to add. Here we are adding name, email, and age.
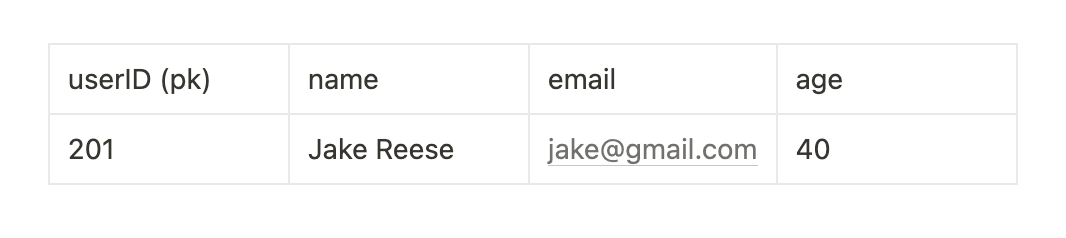
Finally, we sent the PutCommand to DynamoDB with our params object containing the table name and item to write to our table.
This will create an item that looks like this:
Updating Data
We can update an item using the UpdateCommand.
import { UpdateCommand } from "@aws-sdk/lib-dynamodb";

const updateItem = async () => {
  const params = {
    TableName: "users",
    Key: {
      userID: { S: "201" },
    },
    UpdateExpression: "set age = :age",
    ExpressionAttributeValues: {
      ":age": { N: "39" },
    },
    ReturnValues: "UPDATED_NEW",
  };
  const data = await client.send(new UpdateCommand(params));
};

updateItem();
To update an item we once again supply the item’s primary key — in this table that’s “userID”.
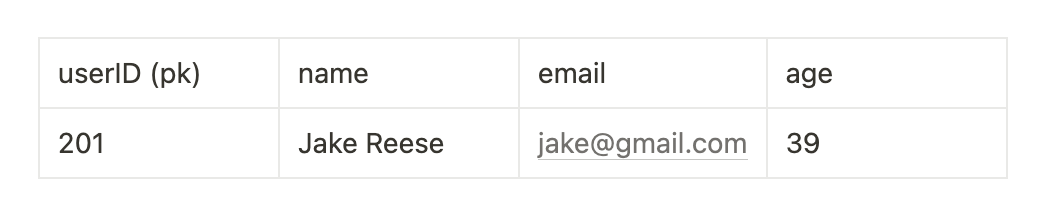
In the UpdateExpression we say we want to update the age attribute, and in the ExpressionAttributeValues, we set the age equal to the new value of “39” (used to be 40).
The result:
Deleting Data
Deleting data is also done by identifying the item’s primary key and sending the DeleteCommand to DynamoDB:
import { DeleteCommand } from "@aws-sdk/lib-dynamodb";

const deleteItem = async () => {
  const params = {
    TableName: "users",
    Key: {
      userID: { S: "201" },
    },
  };
  const data = await client.send(new DeleteCommand(params));
};

deleteItem();
Running this code would delete the item whose userID is equal to “201”.
That wraps up CRUD operations in DynamoDB.
This should give you a good idea and a solid base on how to get started interacting with your database and storing data in it.
Performance & Scaling
Since DynamoDB is designed for scale and performance, no guide would be complete without briefly exploring these features.
In DynamoDB many elements can allow your database to scale high.
These three core elements will increase scalability and performance:
Configure throughput capacity
Primary key data modeling.
The single table design (storing multiple entities in one table)
Let’s take a look at implementing the first one.
I’ll leave references to read about the last two as they are lengthy and out of scope for this introductory guide.
DynamoDB offers a feature on every table to configure the throughput capacity that a table can support.
Essentially, this allows you to define how many concurrent requests you want your table to support. With DynamoDB this is simply a few button clicks away.
Let’s see how we can do this in the console.
Go back to the DynamoDB console and click on the Create table button once again.
In the Table settings below select Customize settings option.
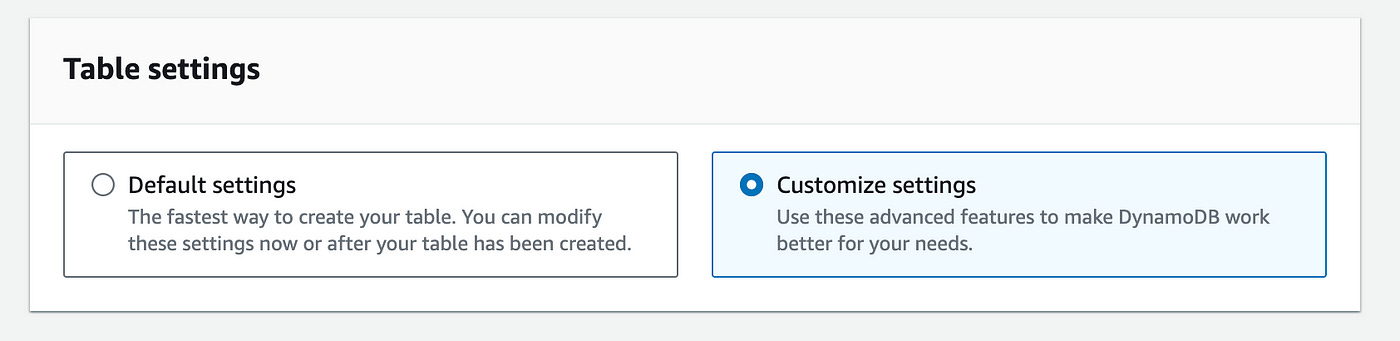
You can now modify the Read/write capacity settings.
By default, auto-scaling is enabled. Take a look at the configuration below:
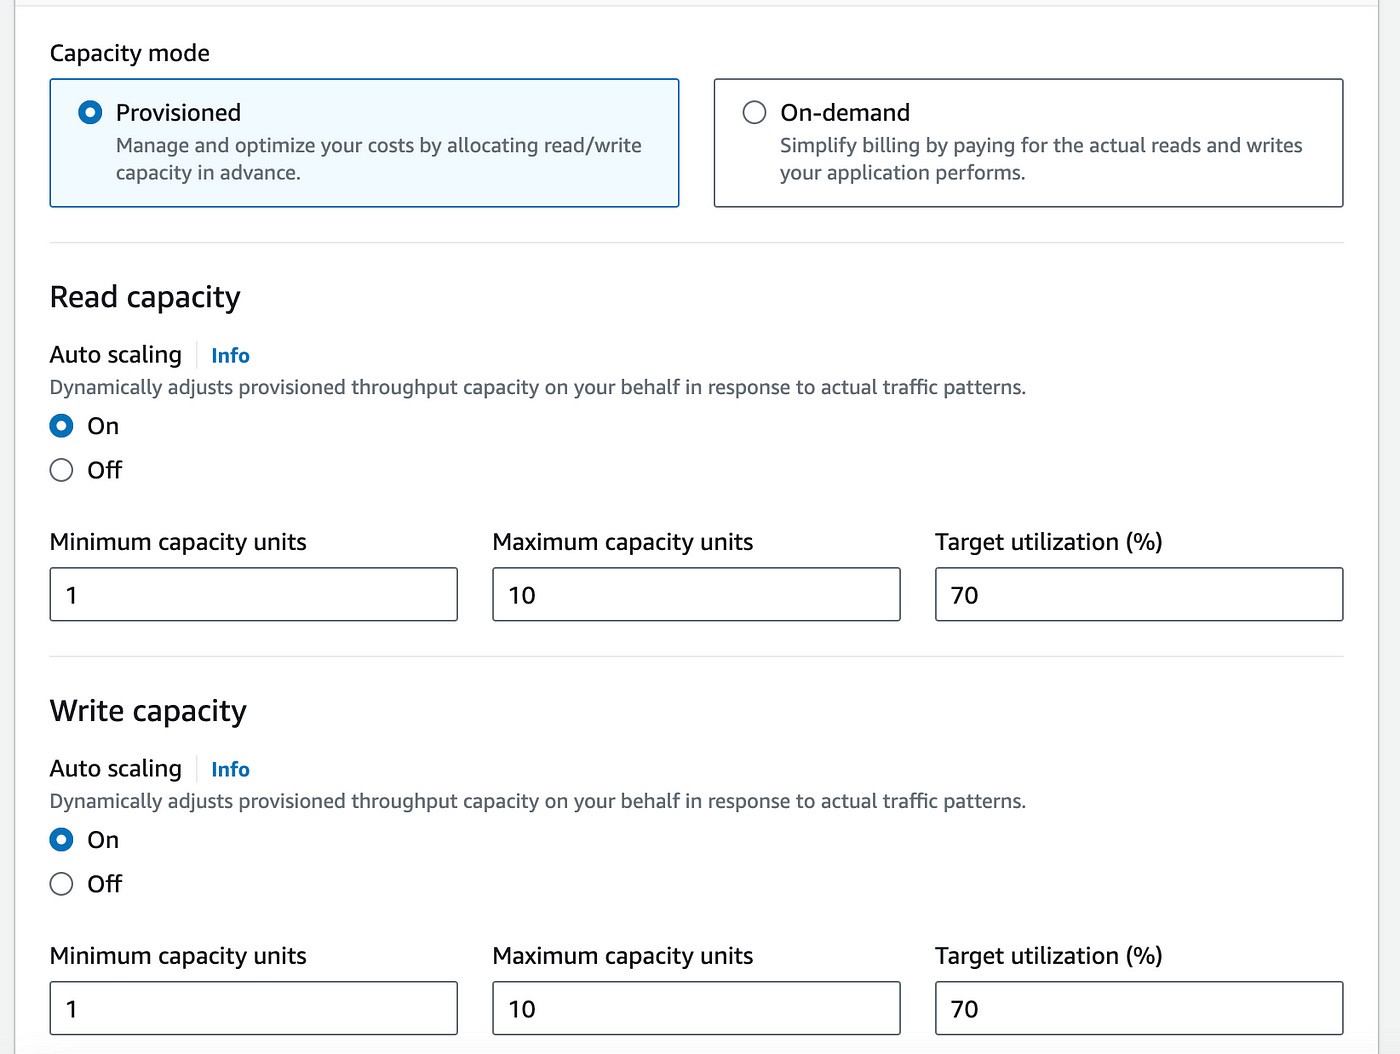
In auto-scale mode, you can select a minimum and a maximum throughput as well as a target utilization.
DynamoDB will stay above the minimum, and below the maximum and aim to stay within the target utilization range.
With auto-scaling turned off, you define a static amount of capacity units and DynamoDB will always provision this amount.
In Capacity mode, you can choose from Provisioned or On-demand mode.
Provisioned mode: lets you specify how much throughput capacity you want your table to add.
On-demand mode: Let DynamoDB manage the throughput capacity by having the capacity dynamically match your application’s traffic usage.
What is throughput capacity?
To support your database having concurrent reads or writes, you need to tell it how much capacity you want to provide it with.
This is done by specifying RCUs — Read Capacity Units for reads and WCUs — Write Capacity Units for writes.
DynamoDB charges you per read; a read is equivalent to reading 4Kbs of data.
If you read one large item consisting of 4Kbs you will be charged one RCU. If you have two items consisting of 2Kbs each, you can read them both for 1 RCU, and so on.
With writes, a WCU is worth 1Kb instead and these work the same as reads.
With provisioned mode, you can configure the RCUs and WCUs you want your table to support and change them as you go.
With on-demand mode, DynamoDB will automatically provision RCUs and WCUs based on traffic patterns so you can scale high effortlessly.
If you’re curious you can learn more about the other two scaling strategies; primary key data modeling and the single table design.
You’ve now got a solid grasp on the basics of DynamoDB — now go build!
Conclusion
DynamoDB is a powerful, scalable, and fully managed NoSQL database service, ideal for applications requiring scalability, high availability, and resilience.
By mastering its core concepts, from data modeling to CRUD operations and performance optimization, you are ready to use DynamoDB to build robust and efficient databases.
Having learned the basics, you’re now ready to start using DynamoDB for your next project and harness its full potential in handling large-scale data workloads.
👋 My name is Uriel Bitton and I’m committed to helping you master Serverless, Cloud Computing, and AWS.
🚀 If you want to learn how to build serverless, scalable, and resilient applications, you can subscribe to my blog:
https://medium.com/@atomicsdigital/subscribe
Thanks for reading and see you in the next one!